How to Sign a PDF on Mac for Free

Summary :
Learn how to add a signature to a PDF on MacBook, MacBook Air/Pro, and other macOS devices using Preview and a free PDF editor with online and offline options.
Table of Contents
How to Sign on PDF on Mac
Electronically signing PDFs simplifies the approval process for documents, contracts, and more, eliminating the need to print, sign manually, or scan.
This post outlines how to do an electronic signature on Mac using the built-in PDF editing tool, Preview, and a free, comprehensive PDF editor, PDFgear, which offers both online and offline solutions.
Tips: For confidential documents, digital signatures provide stronger security and authenticity.
Here’s a quick tutorial to guide you through the steps visually.
How to Add signatures in a PDF on macOS
How to Sign a PDF on Mac in Preview
On macOS, the built-in Preview app makes signing documents easy. It lets you add handwritten signatures, create them with the touchpad, and even collaborate with your iPhone or iPad for enhanced flexibility.
Additionally, when creating a signature, you can add a description for context or identification.
Step 1. Open your PDF in Preview. If Preview isn’t your default PDF viewer, you can change it on your Mac.
Step 2. Click the “Show Markup” Toolbar and select the “Signature” icon. You’ll have three options to create a signature.
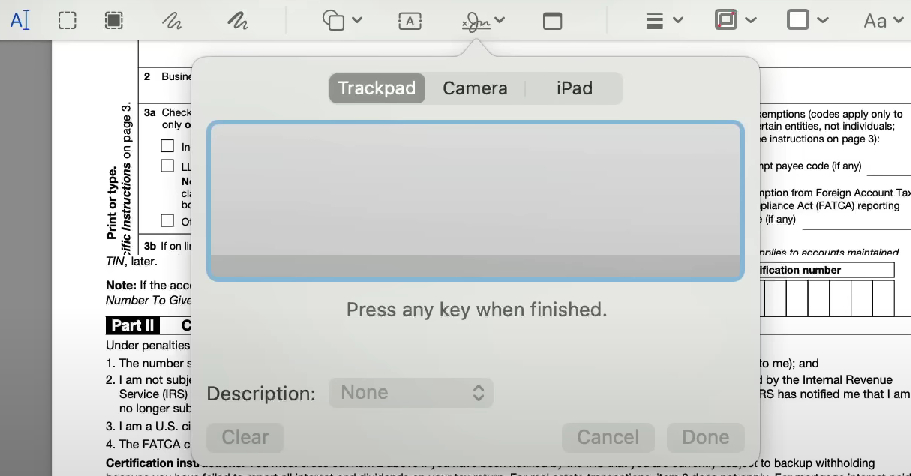
Three Options to Create a Signature in Preview
- Trackpad: Use your fingers to draw directly on the trackpad.
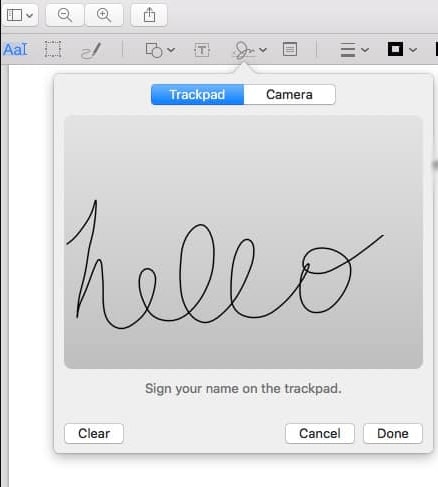
Create Your Signature
- Camera: Take a photo of your handwritten signature to add it.
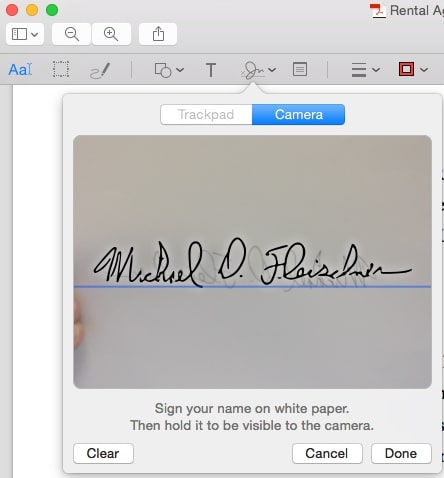
Use the Camera to Create a Signature
- iPhone/iPad: Use your iPhone or iPad to draw your name with your finger or Apple Pencil.
Note: Ensure your iPhone and Mac are on the same Wi-Fi, close to each other, and have “Settings” > “General” > “Handoff” enabled to activate continuity features.
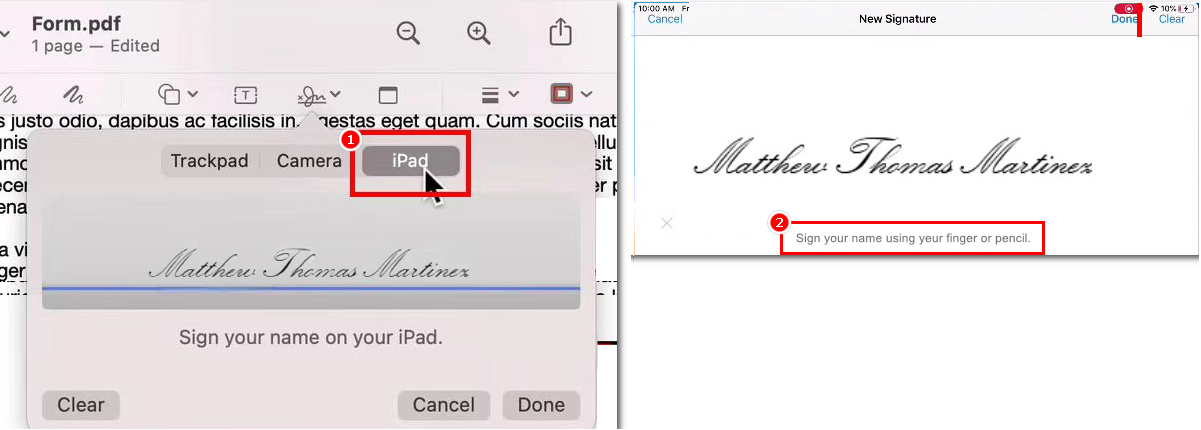
Create a Signature Using iPhone or iPad Collaboration
Step 3. Tap “Done” and position the signature where needed.
Step 4. Save the signed PDF. The signature will be automatically flattened, making it tamper-proof and difficult to remove.
However, Preview does not allow users to type a name to add to a PDF, which might be less appealing for those needing formal signatures.
How to Sign a PDF on Mac with a Free PDF Editor
PDFgear is a powerful PDF editor that is compatible with MacBook, MacBook Pro, and MacBook Air. Unlike Preview, it lets you sign PDFs by typing, drawing, or adding an image.
Additionally, PDFgear allows you to fill in PDF forms, redact text, and password-protect PDFs.
Step 1. Download PDFgear on your Mac, and click “Open File” to choose a PDF.
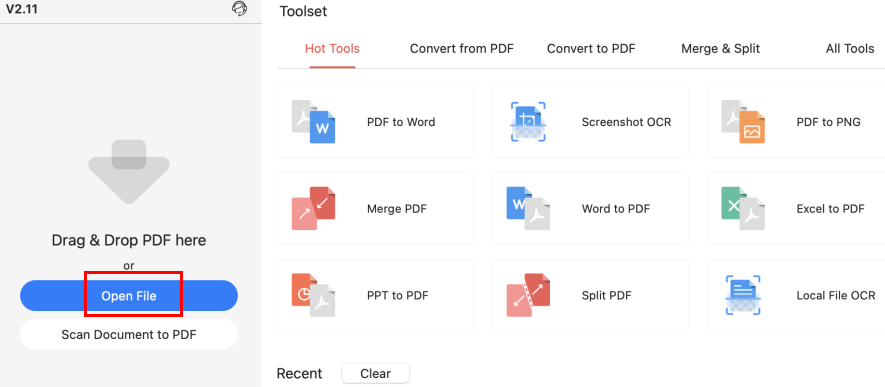
Open PDF with PDFgear on Mac
Step 2. Navigate to “Fill & Sign”, select the “Signature” icon, and hit “Create Signature”.
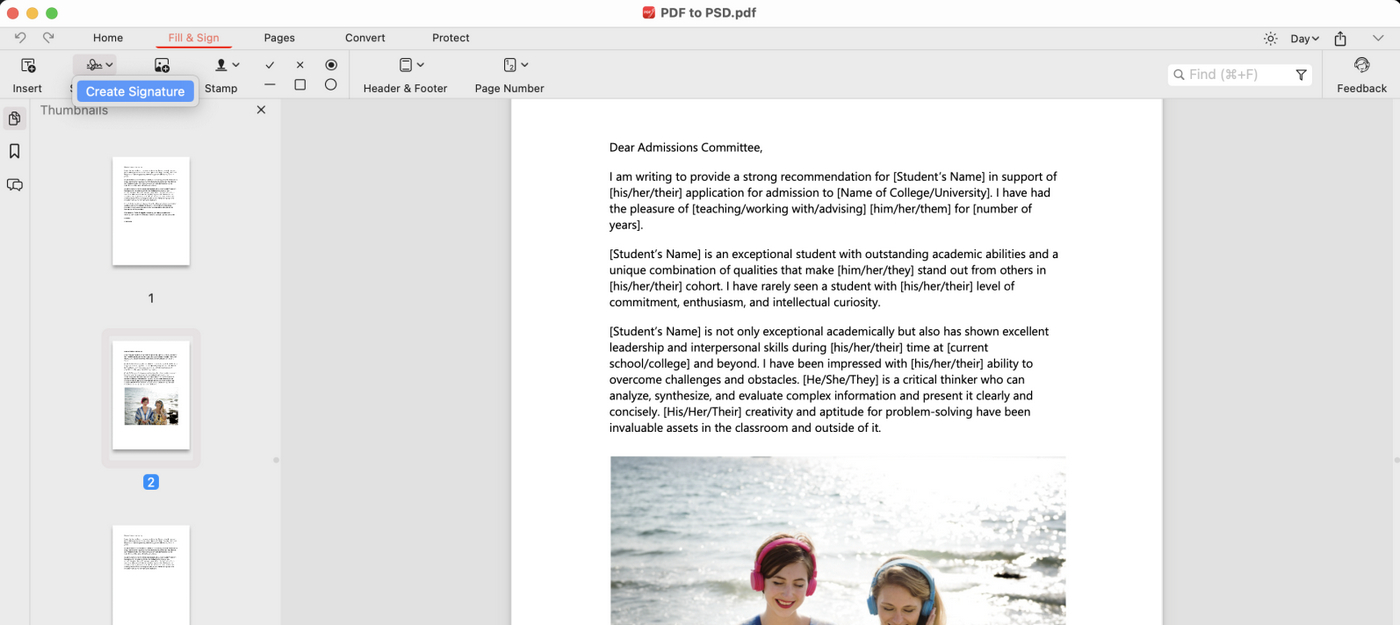
Click Create Signature
Step 3. Choose a signature method: Type your name (with font options), draw it, or upload an image, then click “Done” to complete.
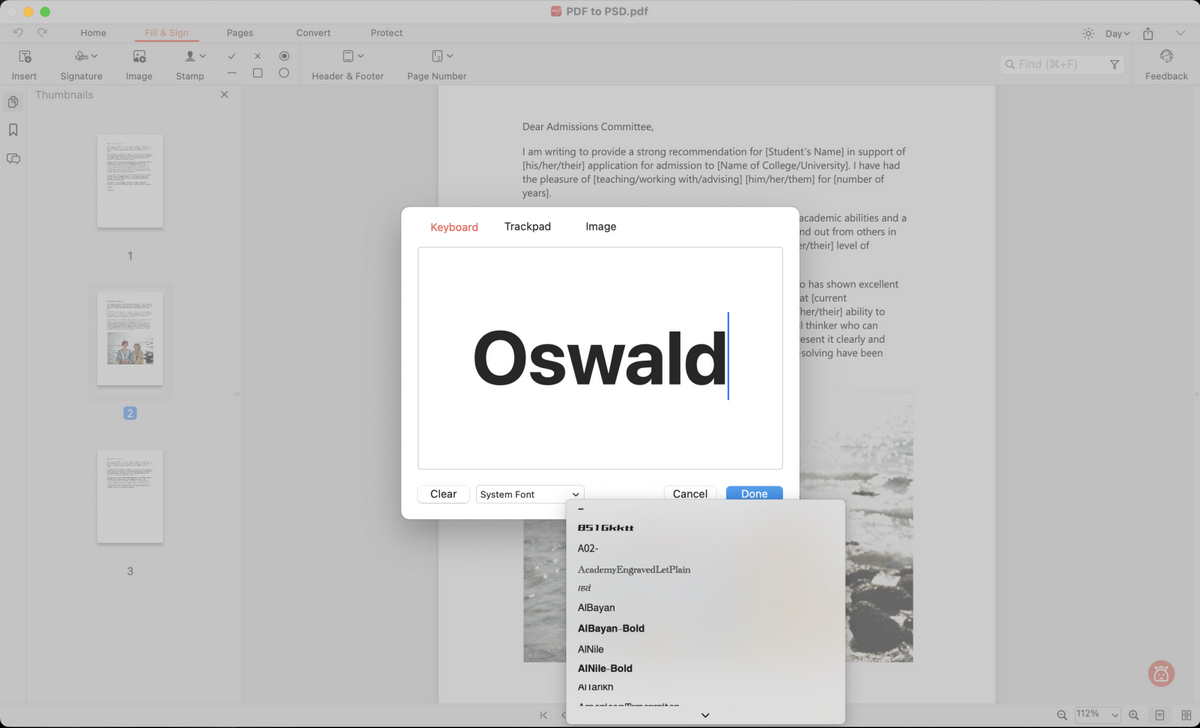
Create a Signature on Mac
Step 4. Drag the signature to the desired position and right-click to select “Apply Signature.”
This action flattens the signature, merging it into the PDF as a permanent part. Once flattened, the signature cannot be deleted, ensuring it is tamper-proof and secure.
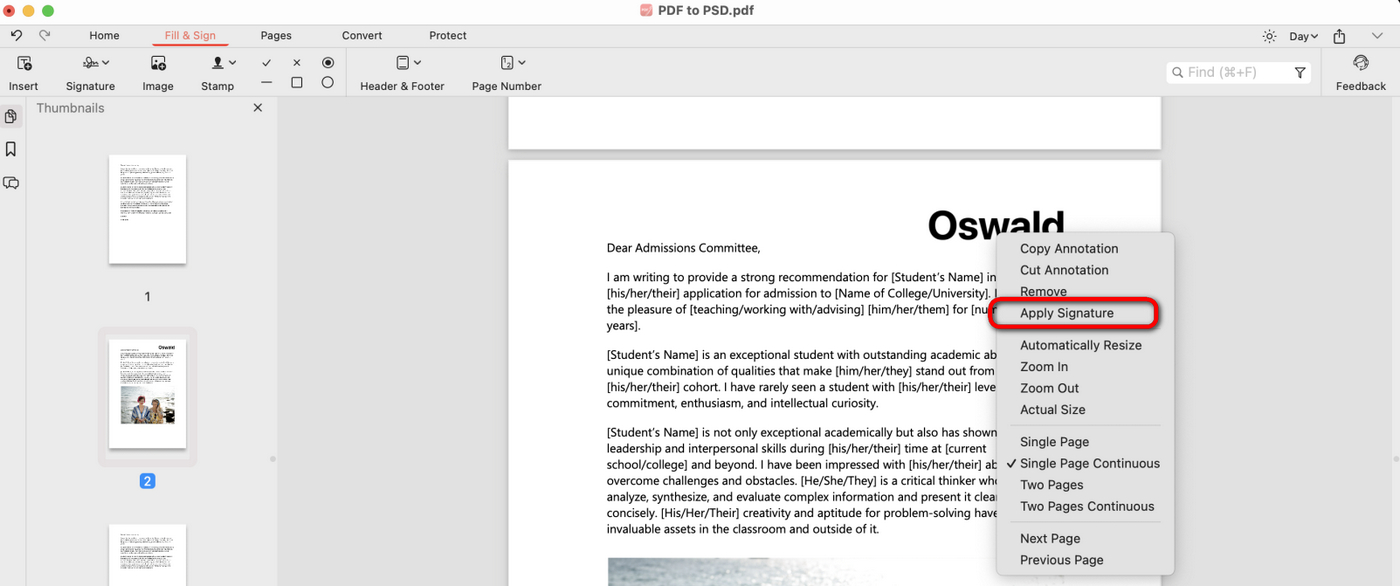
Apply Signature and Save the Signed PDF
How to Sign a PDF on Mac Online for Free
PDFgear offers a convenient online PDF signing tool compatible with any device, requiring no software download, and saving storage space.
You can upload image signatures without quality loss, draw your name with a mouse, or type it using various fonts online for free.
Step 1. Go to PDFgear online editor, and click “Select PDF files” to open a file.
Upload a PDF to PDFgear Online Signer
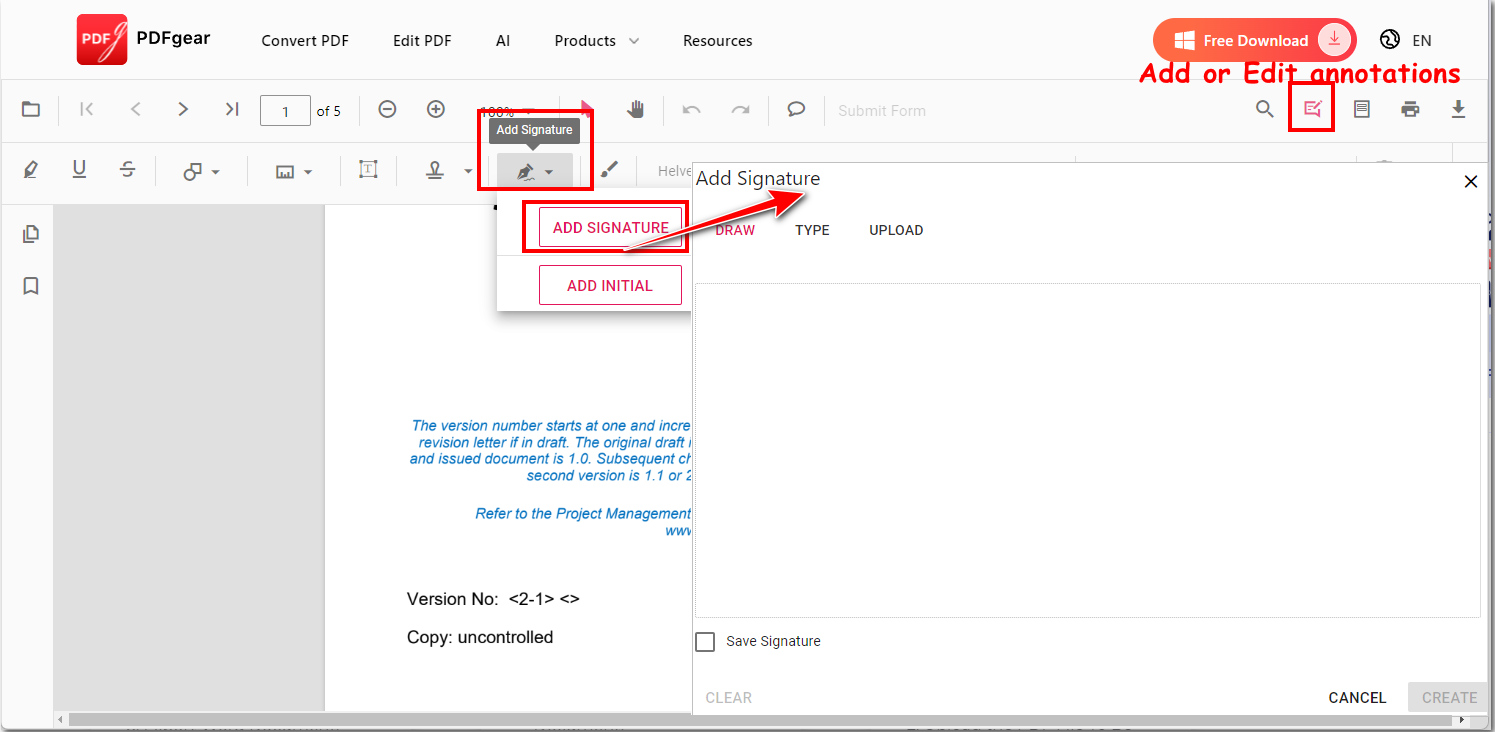
Step 2. Navigate to “Add or Edit annotations”, click the “Add Signature” button, and select “ADD SIGNATURE” or “ADD INITIAL”.
Step 3. Three signature options are available: Draw with your mouse, Type on the keyboard, or Upload an image signature.
Create a Signature Online
Step 4. Place the signature and click “Download File” to save the signed PDF. Rest assured, the signature will be flattened into the PDF, making it secure and undeletable by others.
In addition to signing PDFs, PDFgear offers a complete PDF editing solution. Access all its online tools for free, with no registration, ads, or watermarks.
How to Sign PDF with Digital Signature Certificate Mac
Mac users can utilize the built-in Keychain Access to create a self-signed certificate, and then use Adobe Acrobat to insert a digital signature into PDFs.
Here are detailed steps to follow:
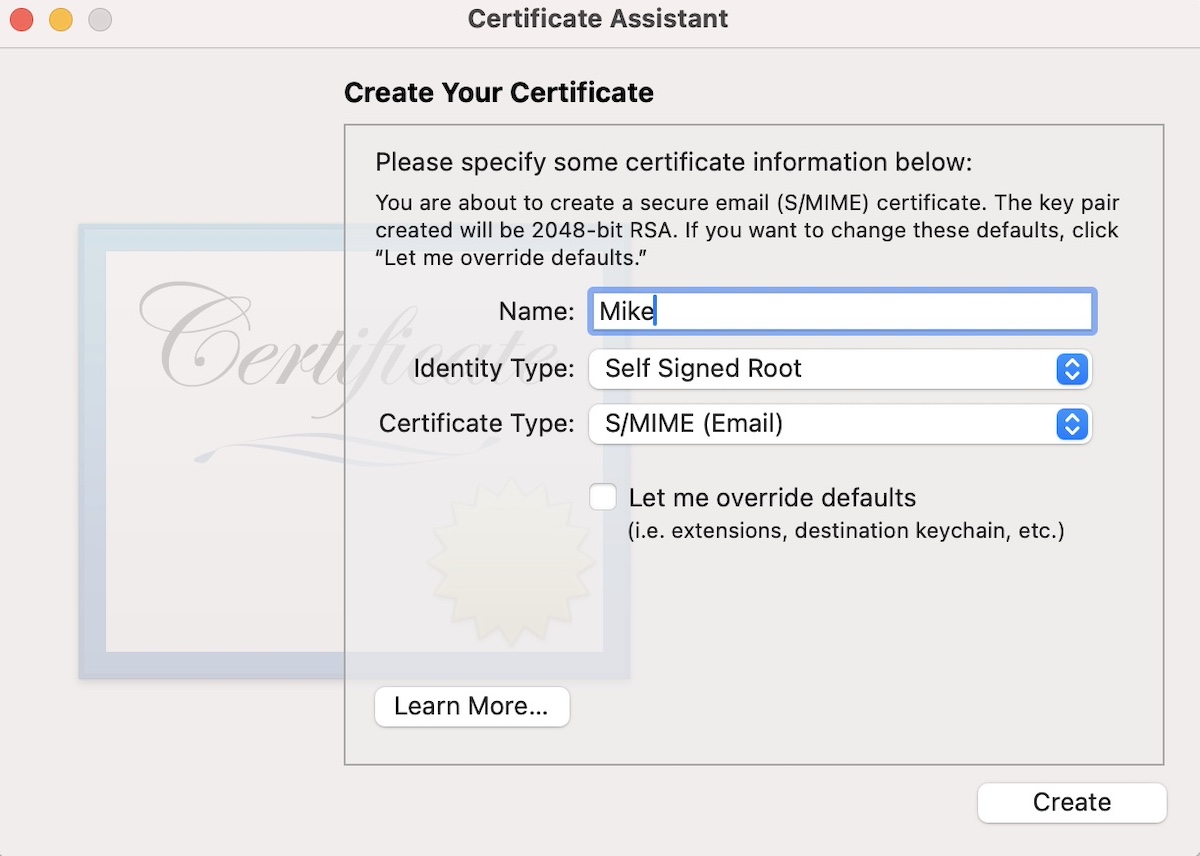
Step 1. Run Keychain Access on your Mac, and navigate to Keychain Access > Certificate Assistant > Create a Certificate.
Step 2. Name the certificate, set the identity, and type, then click “Create” and “Done” to save. The self-signed certificate syncs automatically with Adobe Acrobat.
Create Self-signed Certificate
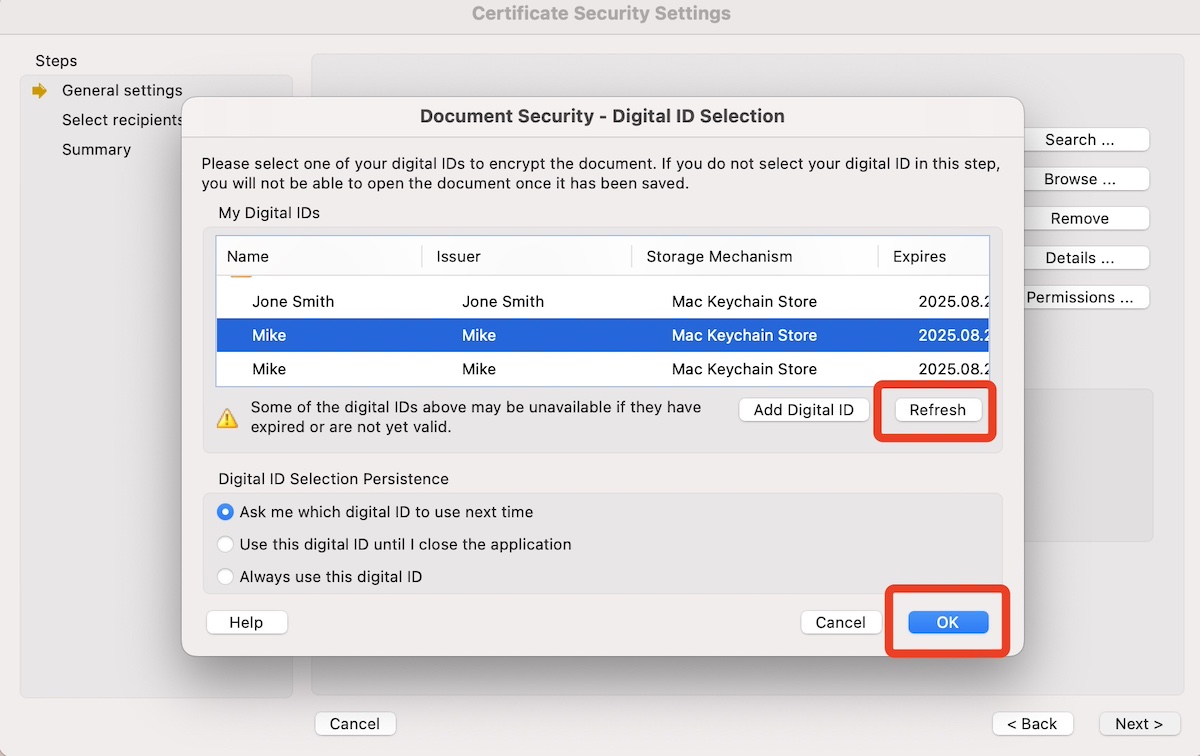
Step 3. Open a PDF in Adobe Acrobat, navigate to the “Protect” tool, and select “Encrypt with Certificate”. Choose the certificate you need to digitally secure the PDF.
Certificate Security Settings
FAQs
Can I add a signature to a PDF without printing and scanning the document?
Use the Preview app to add your signature electronically, open PDF with Preview, select the “Signature” icon, create a signature, and place it in PDF.
Is it possible to save multiple signatures on a Mac?
Yes, Preview lets you save multiple signatures. Once created, a signature is stored in the app, allowing you to reuse it without recreating it.
How do I use my iPhone or iPad to sign a PDF on my Mac?
With macOS Catalina or later, you can use your iPhone or iPad to create signatures in Preview on your Mac. Open Preview, click the Markup Toolbar, then the Sign button, and select Create Signature. Choose your iPhone or iPad as the device to sign on.
What if I need to send a signed PDF to someone else?
Once you’ve signed the PDF on your Mac, you can share it by email or any other preferred method. The signature is embedded in the file, allowing recipients to view it without any special software.
Can I protect my PDF with a signature from being edited?
After signing a PDF, you can save it as a flattened copy, which can make it harder for others to edit. However, to truly protect the document, you should use PDF security features such as password protection or certificate-based digital signatures that offer more robust protection against unauthorized changes.
Sign a PDF with PDFgear and click “Flatten” to prevent it from being edited. For added security, you can set a password: Download PDFgear, open the signed PDF, go to “Tools”, select “Password”, set your password, and save the file.
Conclusion
Preview is a versatile tool for Mac users to add signatures to PDFs on a MacBook, offering basic PDF editing and signing features.
For more efficient PDF management, consider using a dedicated editor like PDFgear. It supports adding electronic signatures and digital signature certificate images, integrating seamlessly with your PDF files.