How to Scan Documents on Samsung Phones and Tablets

Summary :
To scan documents on Samsung phones and tablets, there are 3 effective methods in this instructional guide.
Table of Contents

How to Scan Documents on Samsung
Scanning physical documents digitally has become essential these days. This allows you to review, archive, share or utilize them for various other purposes.
If you own a Samsung phone or tablet, you can easily scan documents using the built-in camera app, Google Drive, or Microsoft Lens app.
To learn more, just check out this tutorial which provides step-by-step instructions for each of these efficient scanning methods.
How to Scan on Samsung Using Camera App
Samsung’s smartphones and tablets come equipped with a suite of advanced features.
Among these features is the built-in camera app that also functions as a versatile scanner which enables you to efficiently digitize a wide variety of documents, images, and more. Here comes the detailed steps.
Step 1. Launch the Camera app on your Samsung phone or tablet.
Step 2. Position your device above the document you want to scan. Ensure the document is completely visible within the camera frame. A vibrant yellow border should frame the document as the camera detects it.
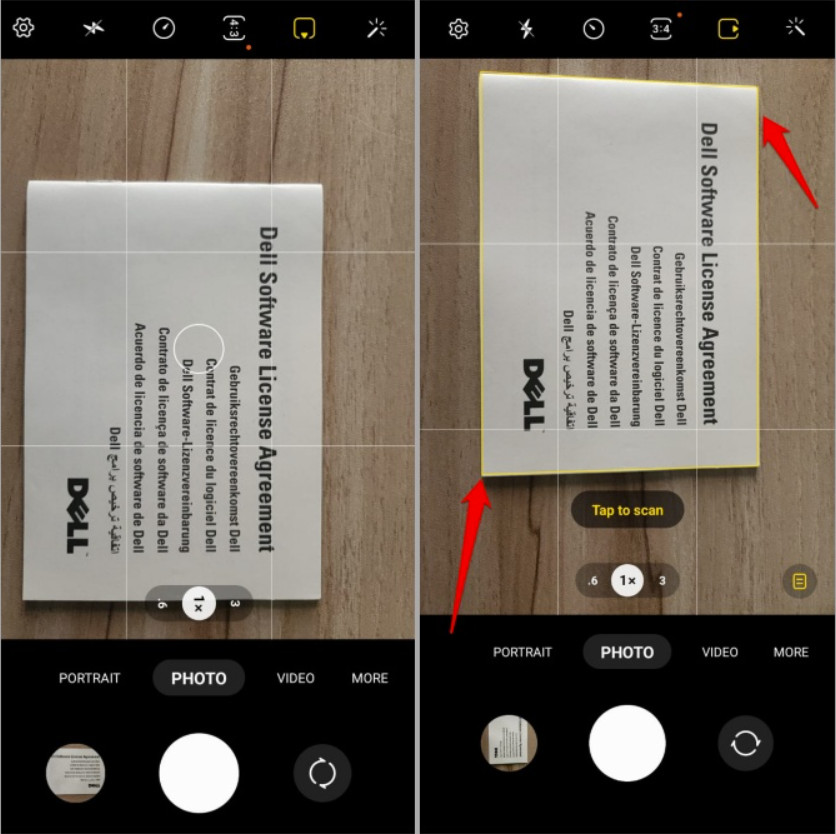
Scan the Document
Step 3. Tap the conspicuous yellow icon adorned with “Tap to scan” to initiate the scanning process. This activates the camera’s advanced algorithms, optimizing the scan for clarity and precision.
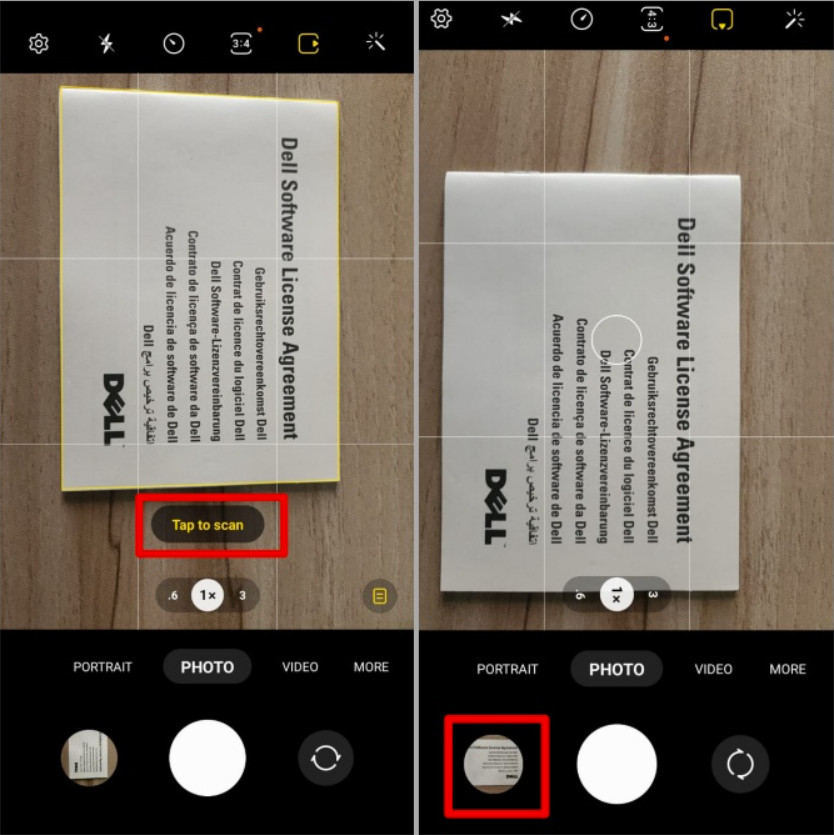
Tap to Scan
Step 4. Using your fingertips, meticulously adjust the yellow border by dragging the dots located at its corners, ensuing that the entire document falls within the scan frame, capturing every essential detail.
Step 5. Once you’re satisfied with the selection, tap the “Save” button to store it in the gallery of your Samsung device.
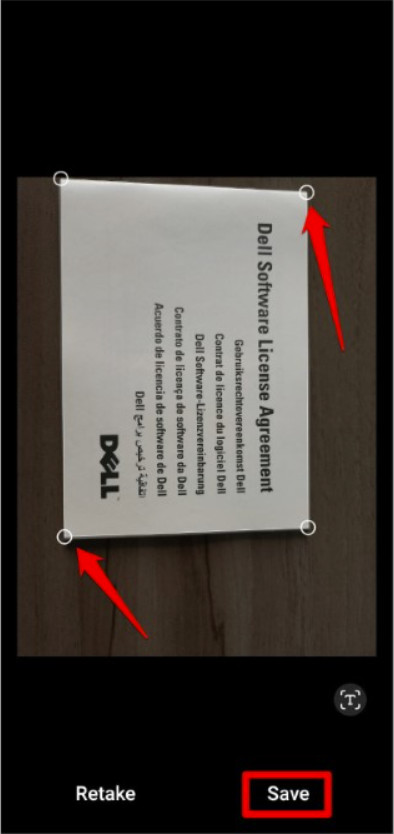
Save the Result
How to Scan on Samsung Using Google Drive
Google Drive, a cloud-based storage and document management platform, also offers a convenient and robust solution for scanning PDF and physical documents on Samsung phones and tablets.
It’s advanced OCR technology can easily extract text from scanned documents, allowing you to effortlessly edit contents on your documents.
Step 1. Navigate to the Google Play store and procure the Google Drive application. Upon its successful installation, launch the app.
Step 2. Tap the “+” button in the bottom right corner and select “Scan” from the menu options. Afterward, authorize the app’s request for camera access.
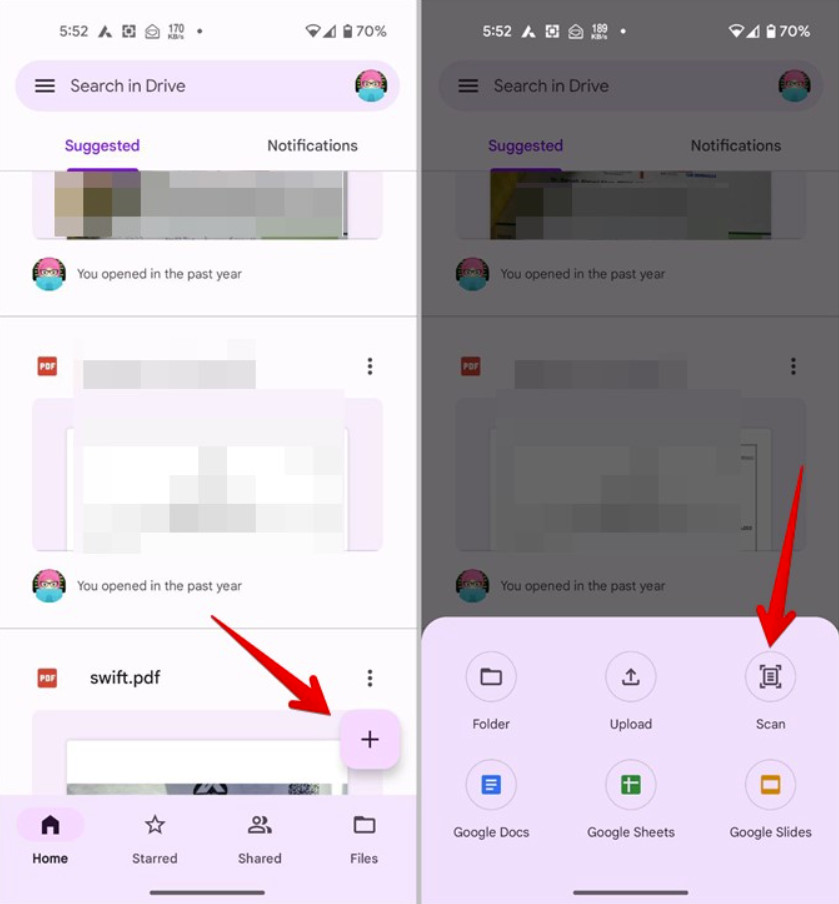
Open Scan Function
Step 3. Carefully place the document you wish to scan within the frame on the camera screen. Then, tap the circular capture button positioned at the center of the screen to scan the current page. If the scan is satisfactory, tap the checkmark button. Otherwise, tap the return button to take another photo.
Step 4. By default, Google Drive converts the captured image into a black-and-white document. To preserve the original colors, tap the color palette icon and select “None.” In addition, you can utilize the additional icons at the bottom to adjust the scan by rotating or cropping.
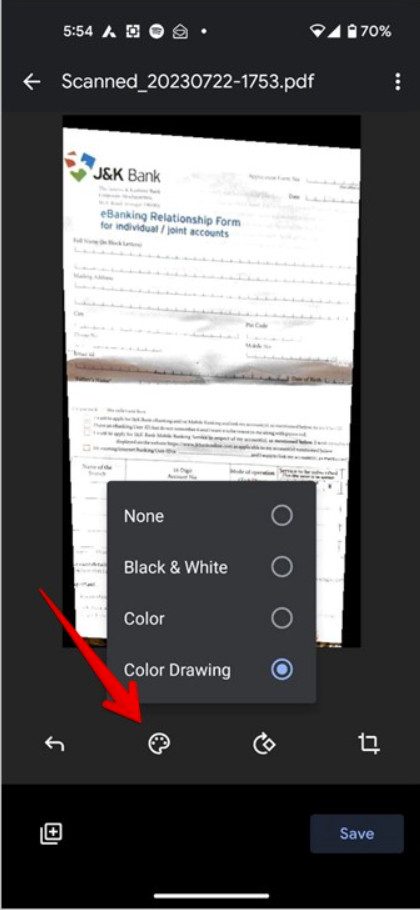
Adjust the Scan
Step 5. To consolidate multiple pages into a single PDF document, select the “+” icon at the bottom of the screen and capture each page sequentially.
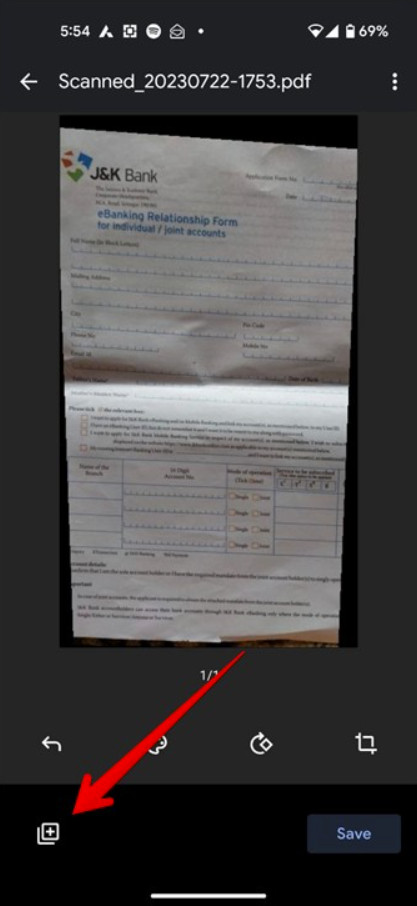
Consolidate Multiple Pages
Step 6. Once all pages have been scanned, press the “Save” button. Designate a file name for your PDF, select its destination on your Google Drive, and opt for the desired Google account for storage. Confirm the operation by pressing “Save.”
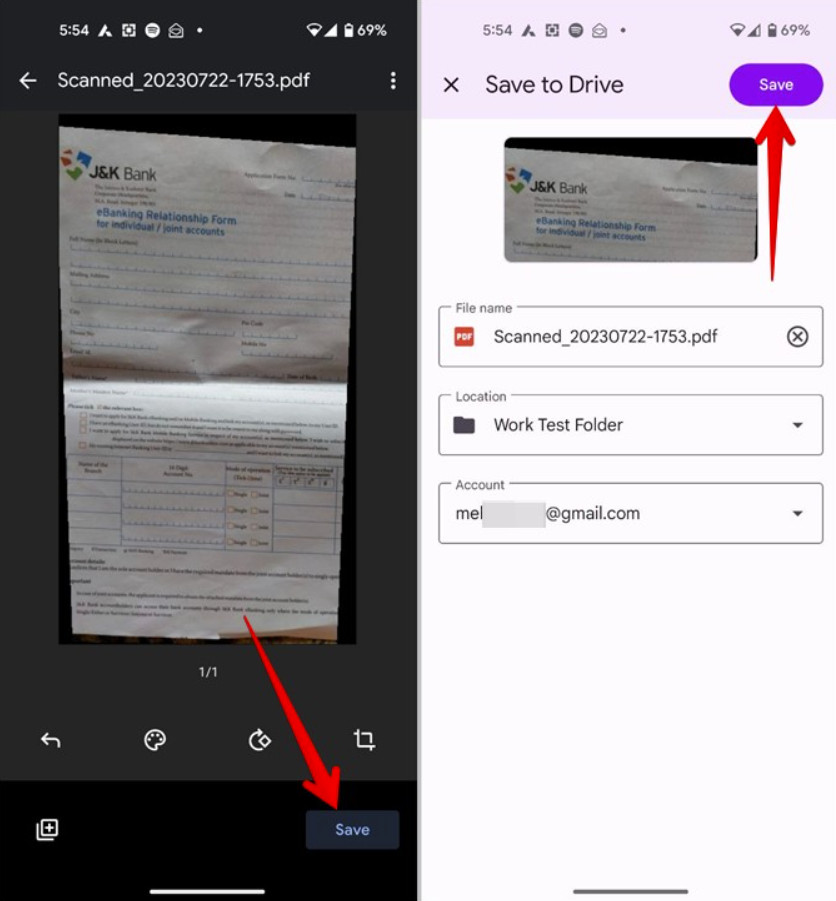
Save the Documents
How to Scan on Samsung Using Microsoft Lens
Microsoft Lens is another tool that enables users to effortlessly scan documents on Android of various types, including receipts, business cards, whiteboard notes, and even handwritten text. If you want to apply scanned documents directly in Microsoft Word or PowerPoint, then Microsoft Lens will be your best choice.
Step 1. Acquire Microsoft Lens by navigating to Google Play, locating the app, and install it on your Samsung phone or tablet.
Step 2. Launch Microsoft Lens. Slide the lower menu bar to the left and select the “Documents” option. This action activates Lens’s document scanning mode. If asked, grant it access to your camera and storage.
Step 3. Point the camera at the document within the viewfinder. Tap the circular capture button to initiate the scanning process. Microsoft Lens will automatically enhance the scanned image, removing shadows and straightening it.
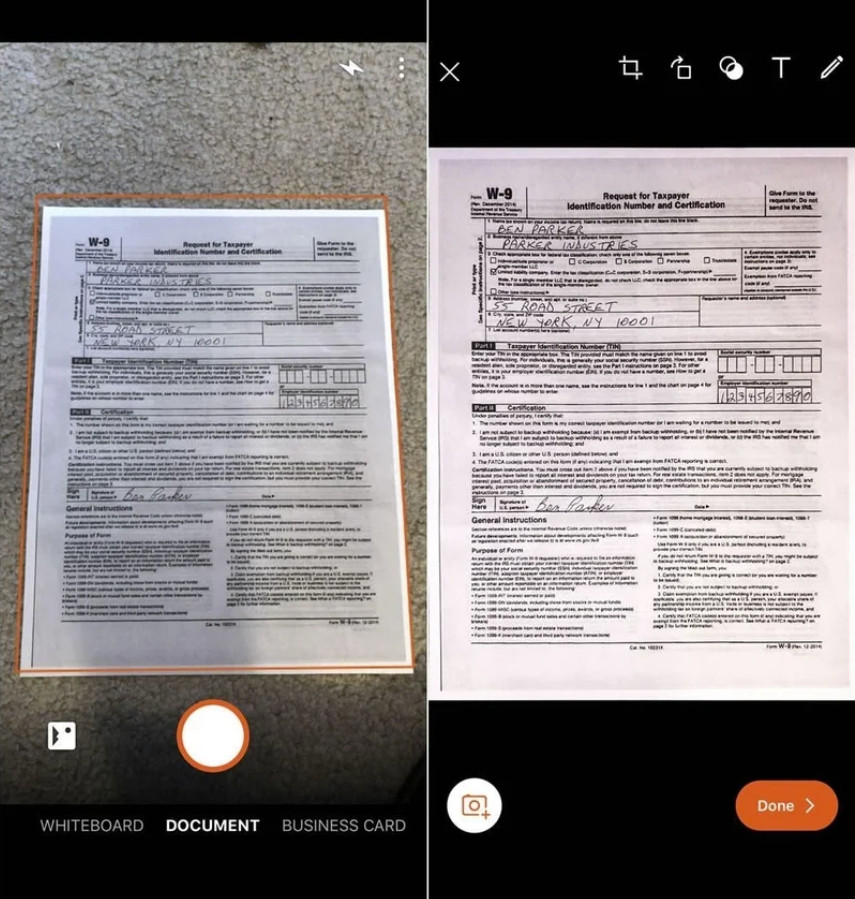
Scan in Microsoft Lens
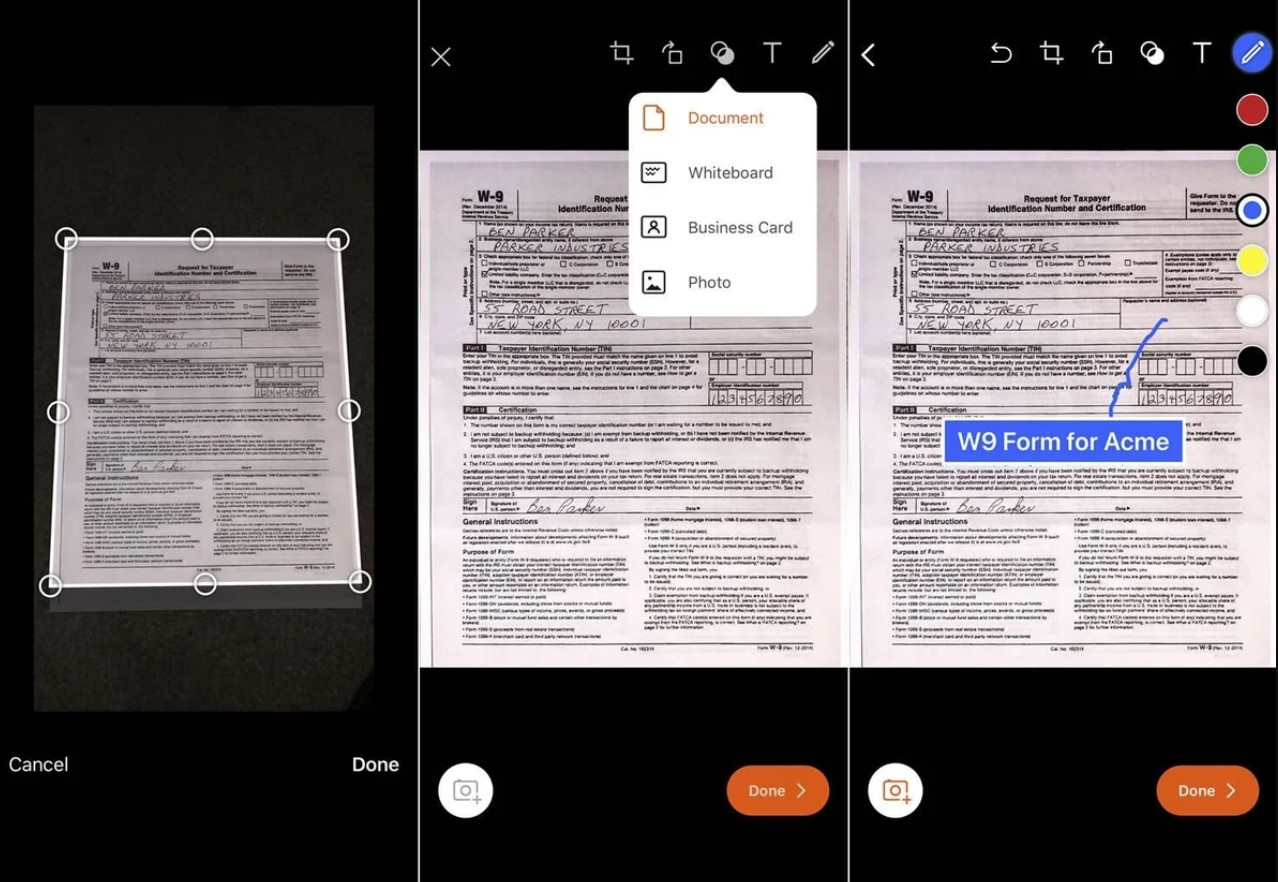
Step 4. Drag the white lines that appear to crop the scanned image to your desired specifications. What’s more, you can utilize various options in the upper right corner for further refinement, including cropping, filters, and more.
Step 5. Once the editing process is complete, tap the “Done” option in the lower right corner to save your digitized document.
Edit and Save Document
FAQs
Can I scan multiple pages into one document?
Yes, you can use the Microsoft Office app to scan multiple pages. Open the app, tap “Actions”, select “Scan to PDF”, scan each page, and tap “Add New” between pages.
Is there a way to extract text from a scanned document?
Yes. After scanning with the camera app, tap the yellow “T” icon, then select “Extract text”. You can then copy the extracted text to use elsewhere.
Do I need to install a third-party app to scan documents on my Samsung device?
No, recent Samsung devices have built-in scanning capabilities in the camera app. However, you can use apps like Google Drive or Microsoft Office for additional features.
Where are scanned documents saved on my Samsung device?
Scans made with the camera app are typically saved to your Gallery app. If using Google Drive, scans are saved to your Google Drive account.