How to Add a Fillable Text Box in PDF
Summary :
Learn how to add filable textbox into PDF files, so it can be easily filled out in most mordern PDF readers. 3 free and paid methods are provided.
Table of Contents
Add Fillable Text Fields in PDF Online Now!
PDFgear allows you to insert fillable form fields into PDF in the browser for free.
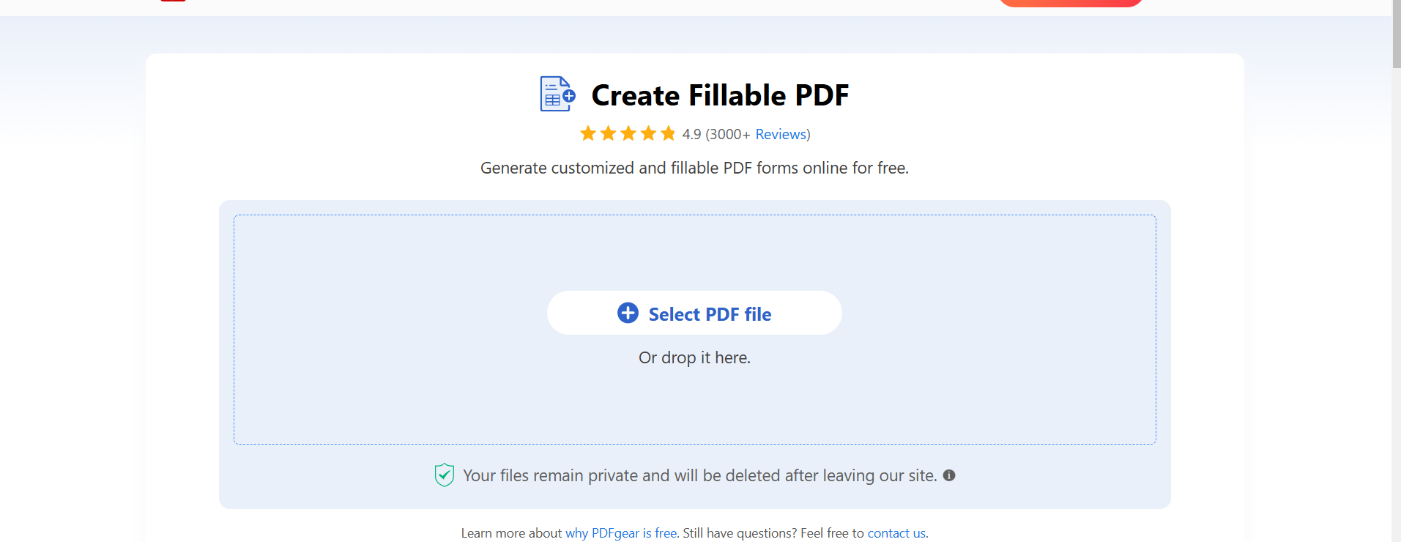
Step 1. Go to PDFgear online fillable PDF creator.
Step 2. Click Select PDF file to open the PDF.
Step 3. Click Textbox from the upper menubar, and click on the PDF to insert it.
Step 4. When you’re done inserting, click the upper-right Download file button to get the file.
How to Add Fillable Text Boxes to PDF Online: Step by Step
PDFgear’s online tool allows you to insert various fillable form fields like textboxes, dropdowns, checkboxes, list boxes, etc. into PDF.
With it, you get to create fillable PDF documents instantly on computer and mobile phones for free, without signing up.
Video Tutorial

Step 1. Go to PDFgear Online Fillable PDF Maker, and hit the Select PDF file button to open the PDF document you need to work with.
Step 2. From the upper menubar, select Textbox, and click to place it on the form area that needs to be filled.
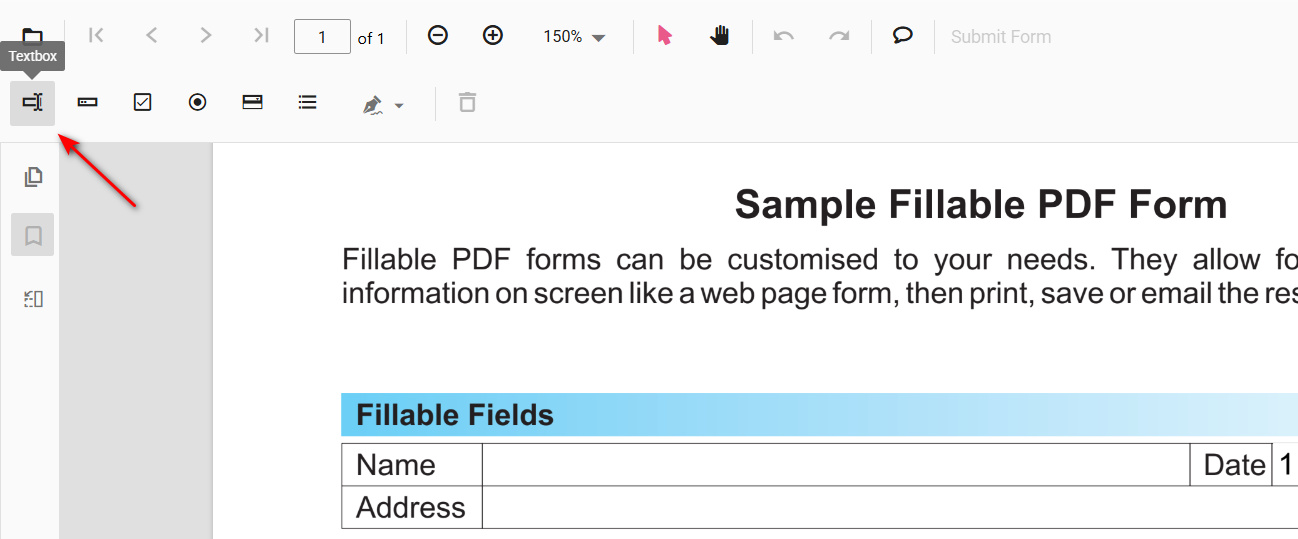
Click Text Box
Step 3. Right-click on the added Textbox and click Copy, and then you can use the keyboard shortcut Ctrl + V (Windows) or Command + V (Mac) to duplicate the fillable textbox as needed.

Duplicate Textbox
Step 4. Right-click on the field and click Properties for more customizations like tooltip, visibility, read-only, required, show printing, multiline, etc.
💡Don’t know the meaning of each form field property? See general property explanations.
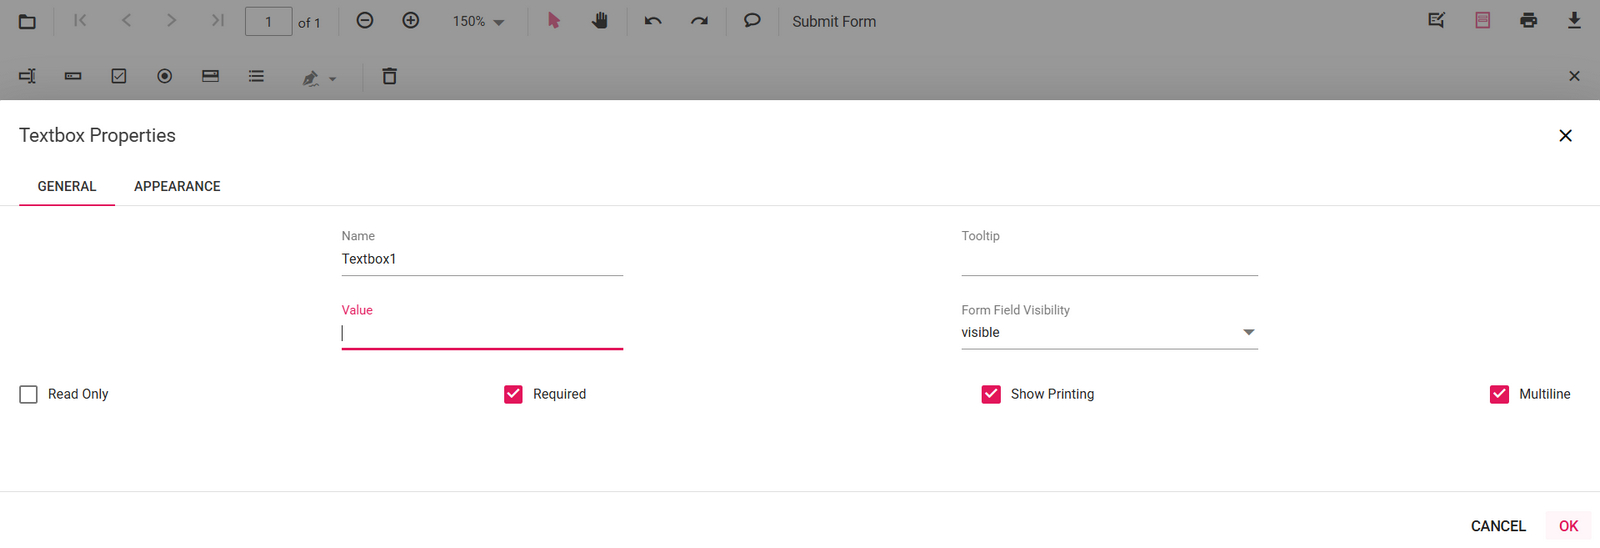
Textbox Properties
Step 5. In the Properties window, go to Appearance and you can also change typography settings like font type, font size, border color, alignment, etc.
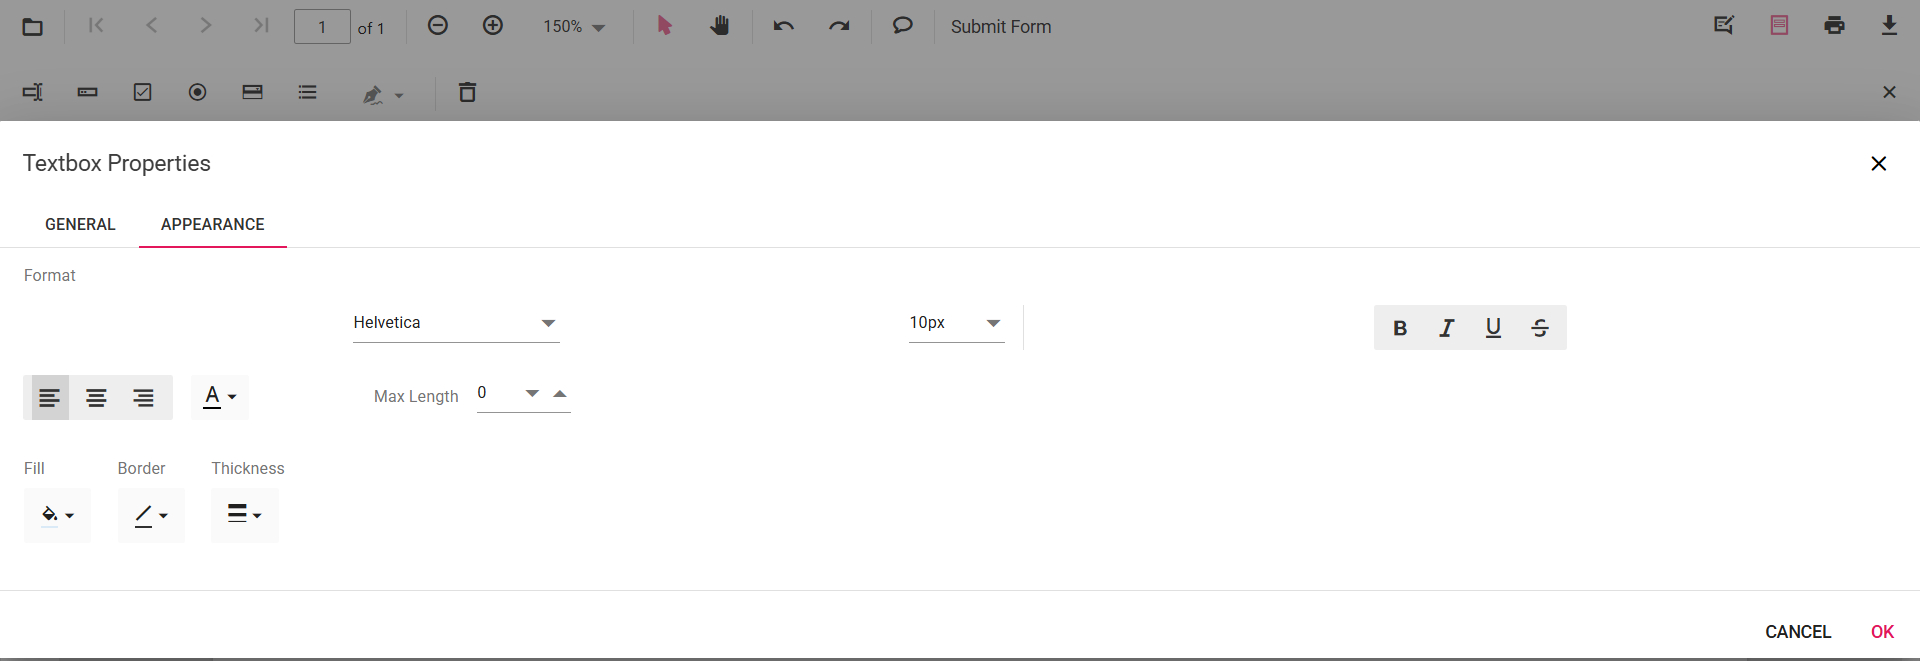
Textbox Appearances
Step 6. When you’re done inserting all fillable text boxes, click the Download file button in the upper-right corner to save the fillable PDF.
Make sure not to go with the Print option, which makes the form non-interactive.
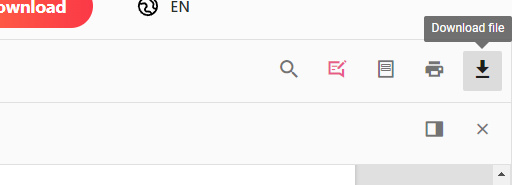
Download File
Add Fillable Text Boxes in PDF Automatically Using Adobe Acrobat
If you need to insert fillable text box in PDF automatically, then Adobe Acrobat Pro DC is recommended.
It has a “Form field auto detection” feature, which automatically inserts fillable text fields where apropos.
However, you should note that you need Adobe Acrobat Pro DC which is a subscription-based PDF editor tool that costs at least $14.99/mo.
Step 1. Launch Adobe Acrobat Pro DC, go to the Tools section, and click Prepare Form from the Forms & Signatures section.
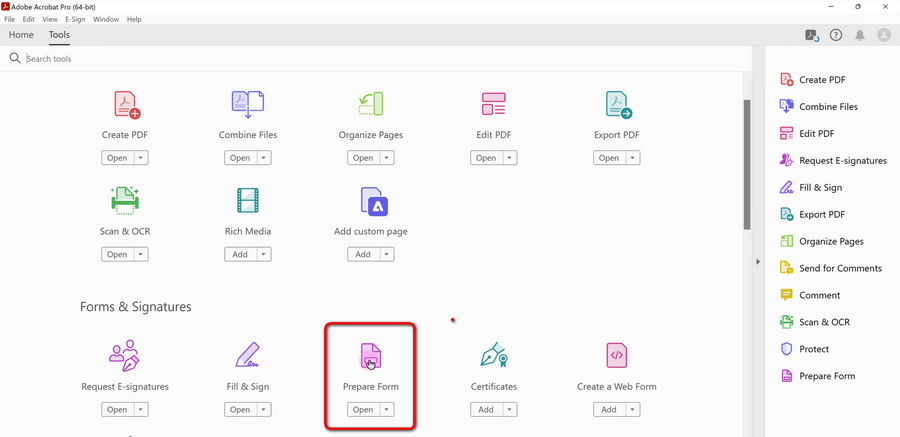
Prepare Form in Adobe Acrobat
Step 2. To add a fillable text box in an existing PDF, hit Select a file from Single File to import your PDF. By default, the Form field auto detection feature is on, keep it that way.
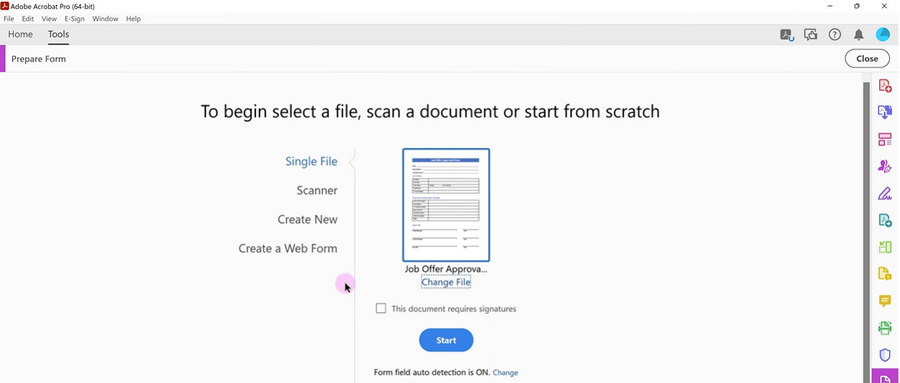
Import Single File to Adobe Acrobat
Step 3. Then Adobe Acrobat Pro DC will automatically analyze the imported PDF document and add form fields.
Step 4. If you need to insert an additional text box, simply hit the Text box option from the upper panel, and drop it on your PDF.
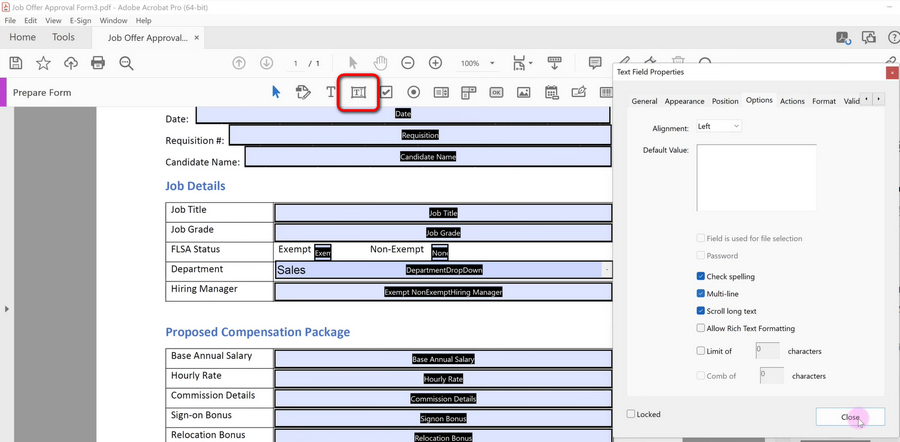
Add Fillable Text Box in Adobe Acrobat
Step 5. Additionally, you can also select and delete unwanted text fields from there.
Step 6. Lastly, go to the File tab and select Save As to save the PDF document with fillable text boxes.
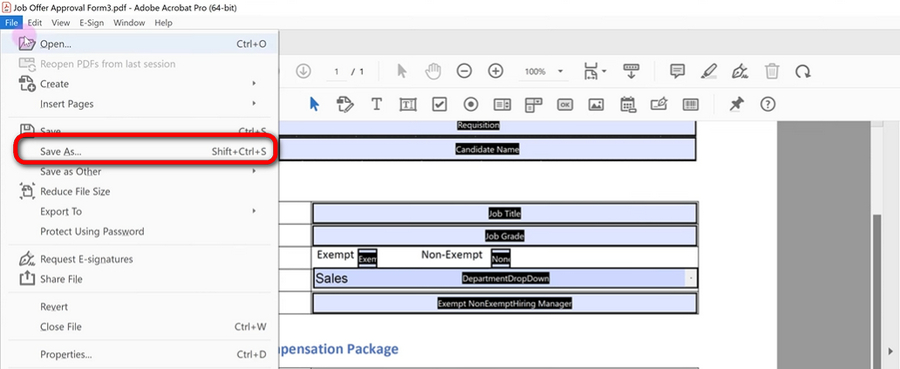
Save PDF with Fillable Text Boxes in Adobe Acrobat
How to Add a Fillable Text Box in PDF Using LibreOffice
Regarding making fillable PDFs, another free, popular, and safe choice is LibreOffice.
LibreOffice is a versatile and highly recommended freeware for you to edit PDFs on Windows, Mac, and Linux, and it’s open-source.
Step 1. Download and install LibreOffice from the LibreOffice official website, and make sure to choose the correct System type.
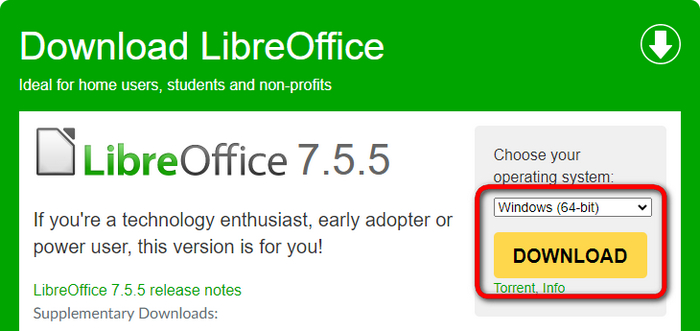
Download LibreOffice for Your System
Step 2. Open LibreOffice on your computer, go to File and hit Open from the dropdown to open the PDF document in LibreOffice Draw.
Step 3. Go to the upper-left corner, click on the View tab, select Toolbars from the dropdown, and hit Form Controls. This will enable the Form Controls panel.
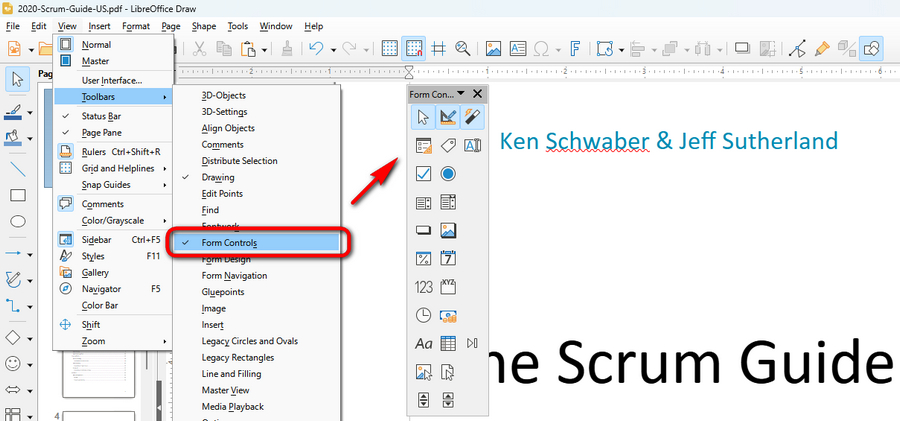
Enable Form Controls in LibreOffice Draw
Step 4. Click the Text Box option in the Form Control panel, and click and hold your mouse on your PDF to insert a fillable text box with the defined size. Note that it’s not a text box for inserting text, so you can’t type in text for now.
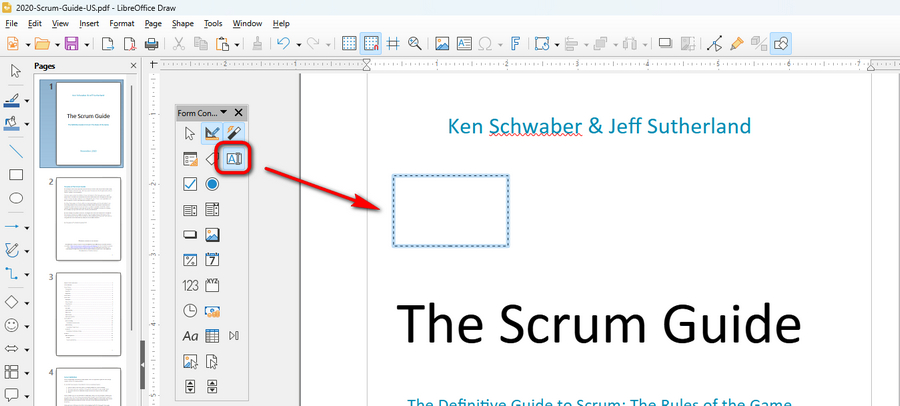
Add Fillable Text Boxes in LibreOffice Draw
Step 5. Go to the File tab, select Export As from the dropdown, hit Export as PDF, choose a destination folder in the Export window, and hit Save.
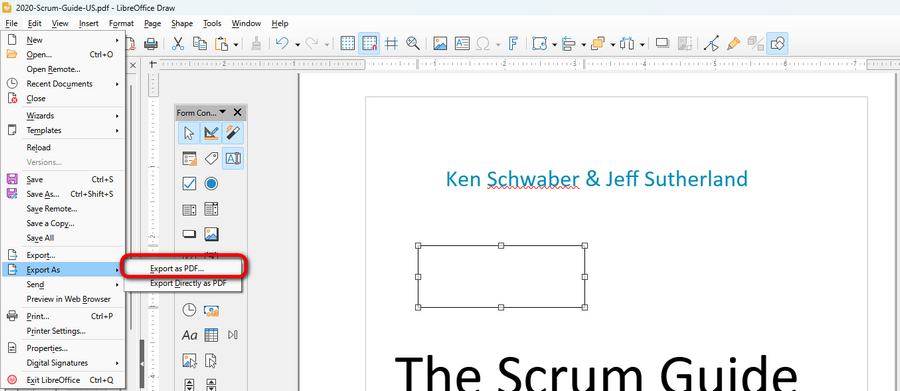
Save and Export PDF with Fillable Text Boxes
Step 6. In the subsequent PDF Options window, make sure to check the Create PDF form option.
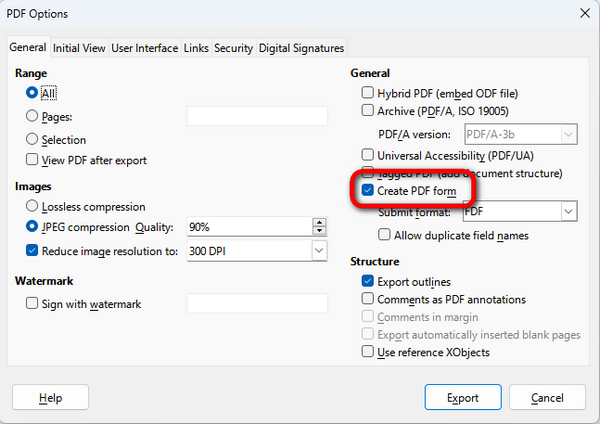
Check the Create PDF Form Option
Step 7. Now if I open the exported PDF in Microsoft Edge, I’ll be able to easily type in text in the fillable text box.
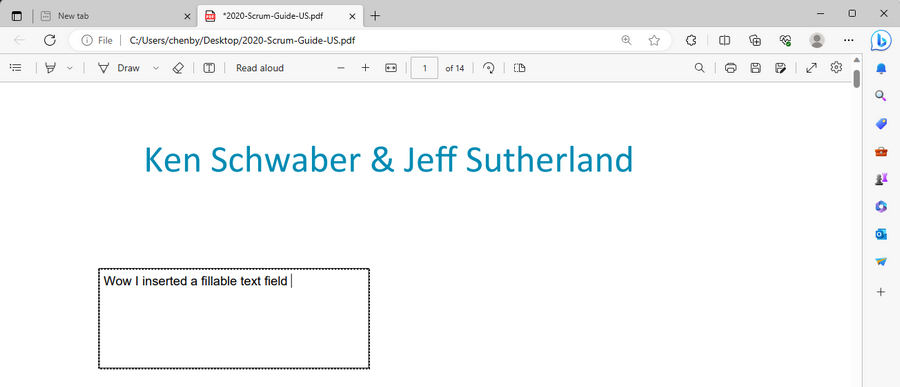
Fill Out PDF Text Boxes in Edge
Fillable Form Fields Explained
To create interactive PDF forms, you’ll need to insert various fillable form fields, each for different purposes. So make sure to use them when fitting.
- Textboxes: Used to enter information into designated fields within the document for forms and applications.
- Checkboxes: Used to enable a squared tick box for users to choose between many options
- Drop-down list menus: Where you can select one or more items from a dropdown list of options
- List box: A scrollable window in a box of list items where users choose one or more options
- Radio Button: Created in group to enable selecting one single item in a list of options
- Password: Inserting fields for typing password-related information, which can be defined as visible or hidden
FAQs
What is a fillable text box in a PDF?
A fillable text box is an interactive field where users can enter text within a PDF document.
How do I add fillable text boxes to a PDF?
Go to PDFgear online fillable PDF maker > select Text box from the menubar > click on the PDF page to insert it > Download the fillable PDF.
Can I add fillable text boxes to a PDF without Acrobat?
Yes, PDFgear online fillable PDF maker is a free alternative to Adobe Acrobat Pro DC that allows you to create fillable PDFs.
Can I Add a Fillable Text Box in PDF Using Microsoft Edge?
Unfortunately, no. While the Microsoft Edge browser now brings in many practical PDF reading and editing features, it’s not really cut out for advanced PDF editing features including PDF form options.
Indeed, you are allowed to insert text boxes to PDF in Edge, yet it’s not a fillable text box, meaning only the first person adding it can type in the information in the text field.
How to Add a Fillable Text Box in Word?
Microsoft Word app provides an inbuilt yet hidden option to add a fillable text box. First, you need to enable the Developer ribbon option from File > Options > Customize Ribbon> Developer, then go to the Developer Tab to insert a Plain Text Content Control, which functions similarly to a fillable text box.
How can I ensure the text fields can be filled out by others?
To ensure the text fields you inserted into PDF can be filled out by any other people who open it, you need to make sure you’ve inserted editable form fields instead of common text boxes. Additionally, make sure to save the PDF with a multi-layer of editable elements, instead of printing the PDF.

