How to Scan Pictures on iPhone without Glare in 5 Easy Ways
Summary :
Discover how to scan photos on your iPhone without glare. The pre-installed and dedicated scanning apps are provided for you to choose.
Table of Contents

How to Scan Photos on iPhone
Photo scanning and editing now can be easily accomplished with just an iPhone.
This article covers five simple methods to scan photos on an iPhone, each with step-by-step instructions. With a few quick adjustments, you’ll capture clear, glare-free images effortlessly.
How to Scan Photos on iPhone Using the Camera App
Scanning photos using your iPhone camera is super convenient as it needs no additional software installation.
And the high-quality camera captures important details, making scanning photos an efficient task.
Step 1. Open the iPhone’s camera.
Step 2. Place the photo you want to scan in the middle of the lens.
Step 3. Press the capture button in the middle below the screen.
Step 4. Tap the preview photo in the lower left corner and tap the edit icon to adjust the photo.
Step 5. Tap “Done” to finish the adjustment.
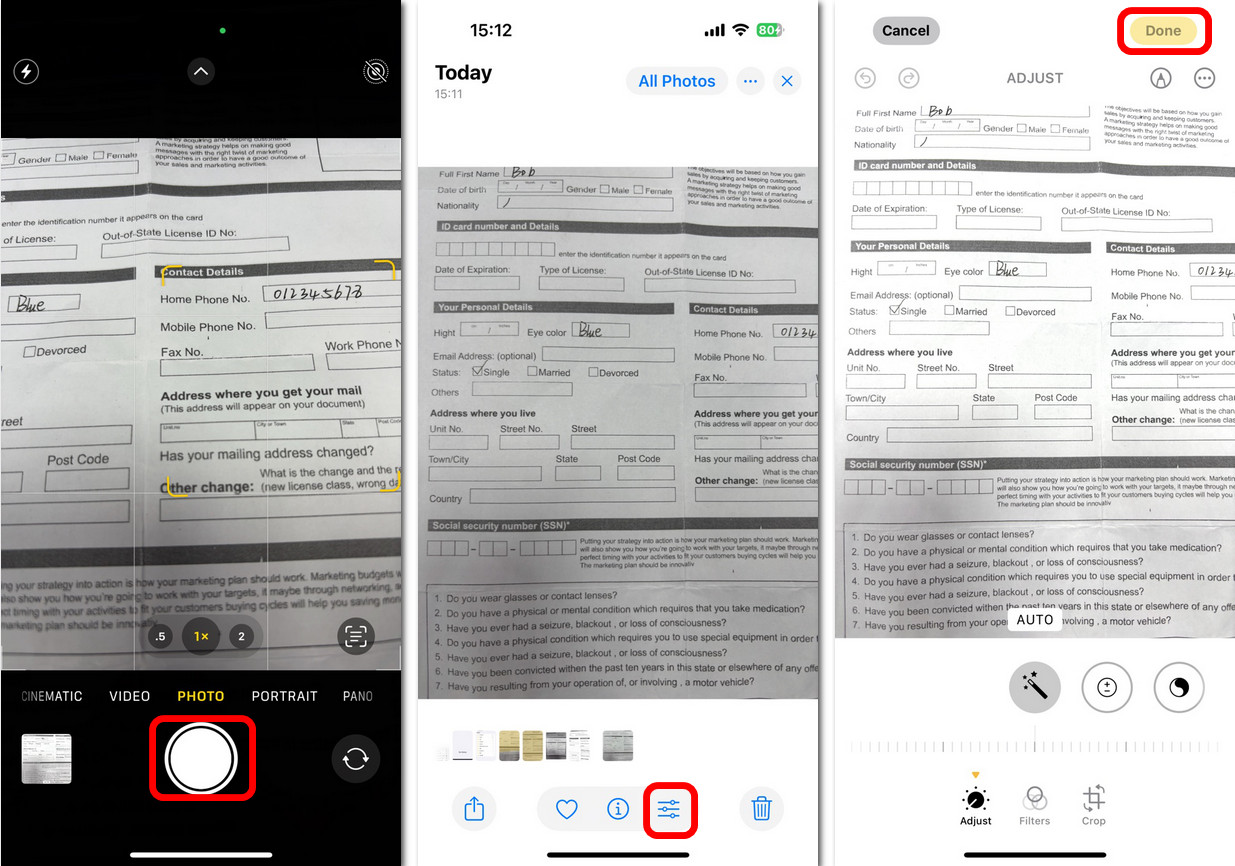
Scan Photos on iPhone with Camera
This method saves the photos in your Photos app. If you want to save multiple photos to one document, read on for the methods below.
How to Scan Photos on iPhone Using Notes
The built-in iPhone Notes app is a popular choice for file editing and management, offering an integrated and convenient way to scan documents right on your iPhone.
Its user-friendly design makes scanning quick and simple.
Step 1. Open Notes > Tap the “Create New Note” icon in the lower right corner.

Create a New Note on iPhone
Step 2. Tap the clip icon in the menu bar below > Select “Scan Document”.
Step 3. Place the photo in the middle of the viewfinder, and Notes will start scanning automatically. You can also switch from the Auto mode to Manual mode.
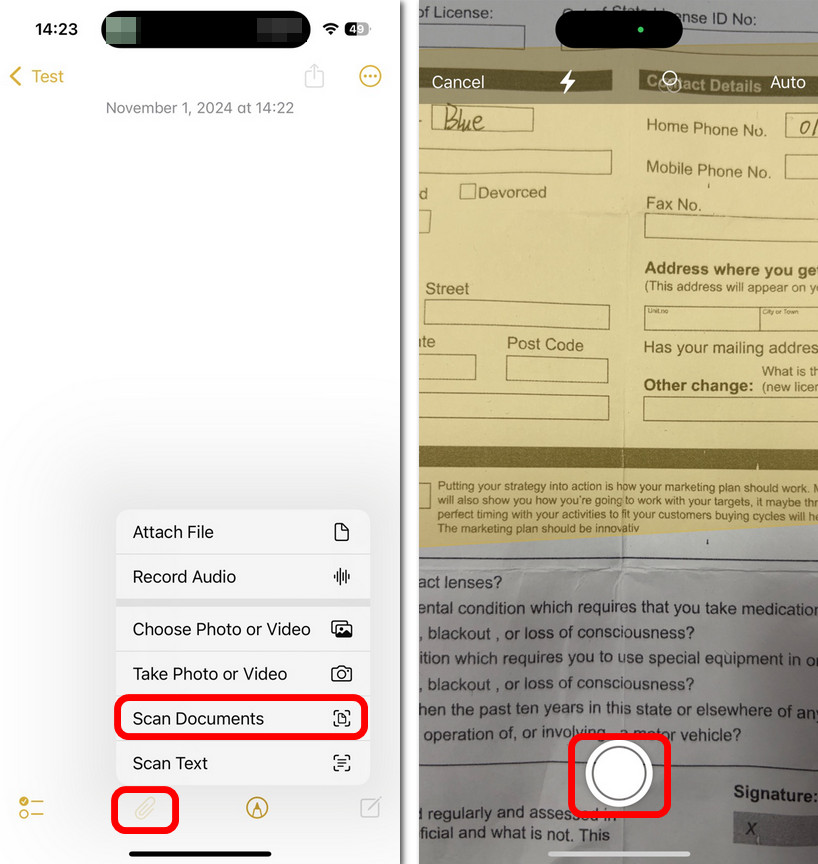
Scan Photo in Notes on iPhone
Step 4. Crop the photo and drag the corners to align with the edges of the photo > Tap “Keep Scan.”
Step 5. Tap “Save” in the lower right corner to finish the scan.
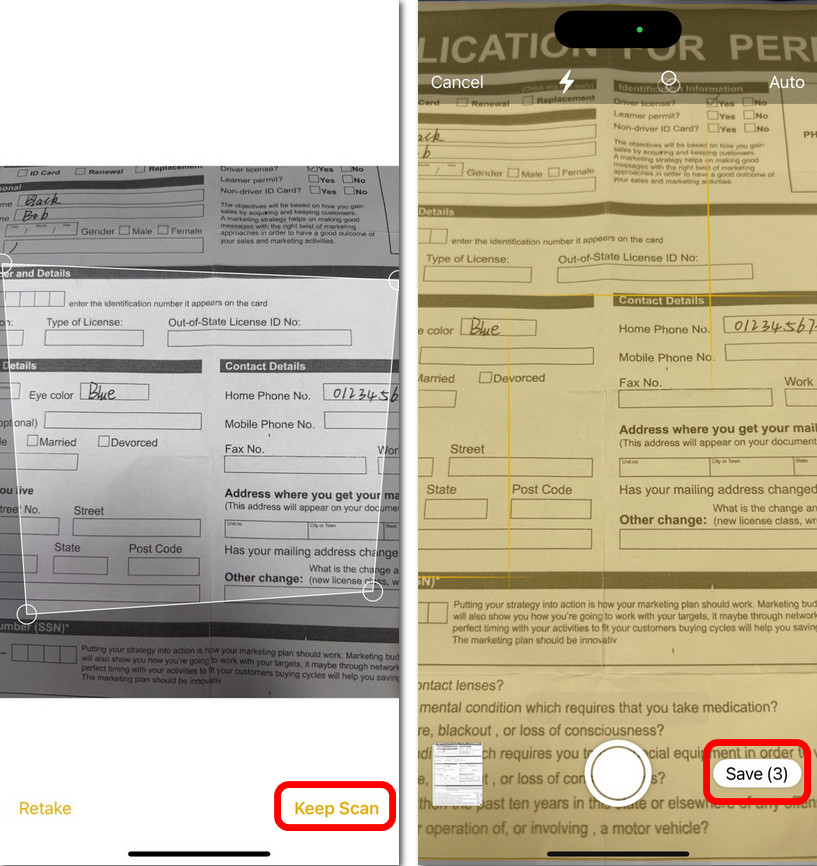
Adjust and Save the Scan in Notes
Scan Photos on iPhone With PDFgear Scan
While the iPhone’s Notes app is suitable for basic scanning, achieving clearer, glare-free scans often requires a dedicated scanning application.
PDFgear Scan is a free, feature-rich scanner for your iPhone that simplifies digitizing documents and photos.
Step 1. Download PDFgear Scan from the App Store.
Step 2. Open the app, tap “+” in the lower menu bar > tap “Camera” to scan photos.
Step 3. Position the photo in the viewfinder, and the app will scan it automatically. You can capture multiple photos and save them as a single document.
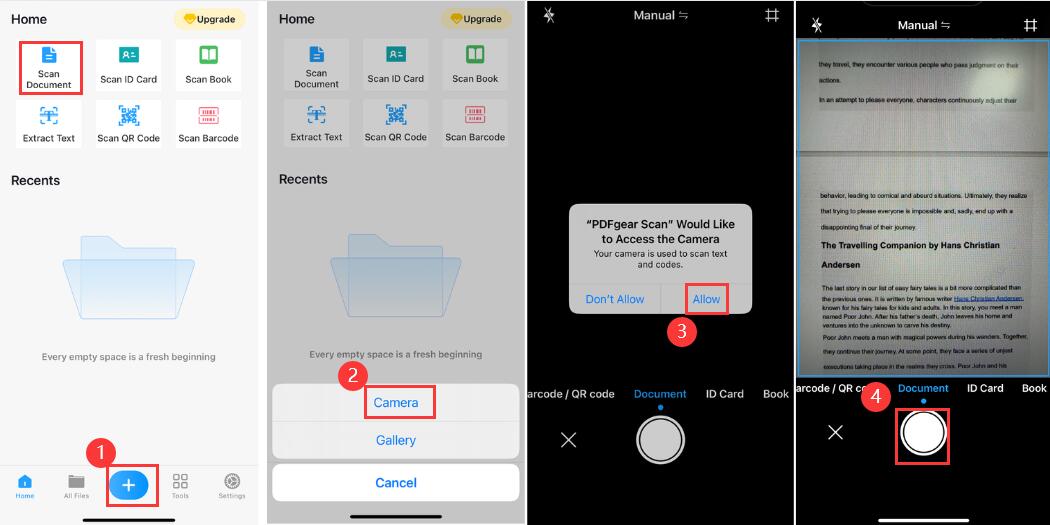
Scan Documents with PDFgear Scan
Step 4. Tap on the image in the lower right corner to edit. After editing is complete, tap “Finish” to save the scanned document locally.
Step 5. Tap the “Share” icon to save the scanned file.
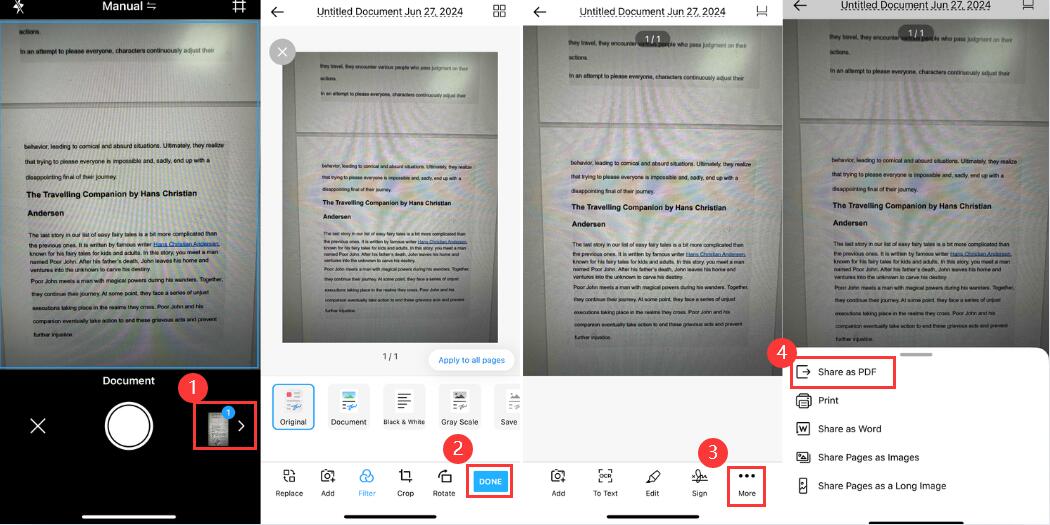
Save Scanned Documents
PDFgear Scan provides advanced editing capabilities including cropping, rotating, filters, etc. to enhance the quality of your scans and streamline your workflow. Besides, it allows you to export scanned documents as PDF, Word, or images to meet different file-sharing needs.
Scan Photos on iPhone via Google PhotoScan
PhotoScan in Google Photos is a powerful tool that takes photo scanning to the next level. It supports automatic cropping, photo enhancement, and glare and shadow removal.
At the same time, its perspective correction and rotation functions make it stand out in the field of photo scanning.
Step 1. Search and download PhotoScan by Google in the APP Store
Step 2. Open PhotoScan, place the photo in the viewfinder and tap the capture button.
Step 3. Move your phone to make it touch each circle one after the other.
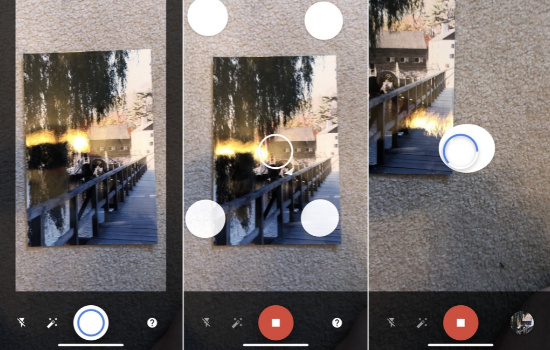
Scan Photo with Google PhotoScan
Step 4. Tap the thumbnail in the lower right corner to edit the photo.
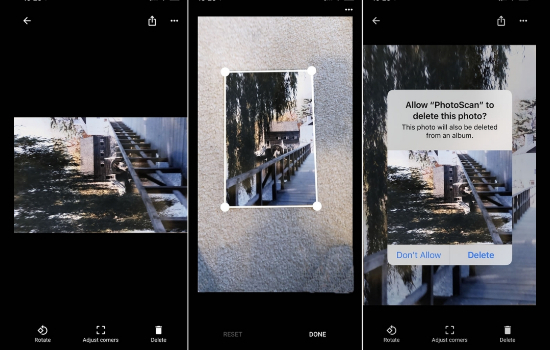
Edit Scanned Photo
Step 5. Tap Share Picture in the upper right corner to save and share the scanned photo.
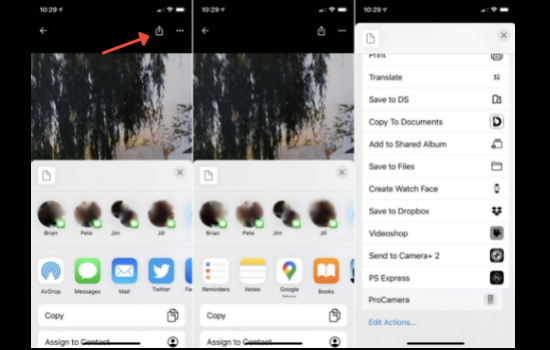
Share Photo
Scan Photos on iPhone via Microsoft Lens
Microsoft Lens is one of the best choices for the digital management of all documents and pictures. During the photo shooting, this app removes shadows and automatically corrects angles to improve the quality of your scanned photos.
Step 1. Search and download Microsoft Lens in the APP Store.
Step 2. Open Lens, slide the lower menu bar to the left, and select “Photos”.
Step 3. Tap the capture button to take the photo. You can also choose to upload local photos.
Step 4. Tap the orange arrow in the lower right corner to view and edit the scanned image.
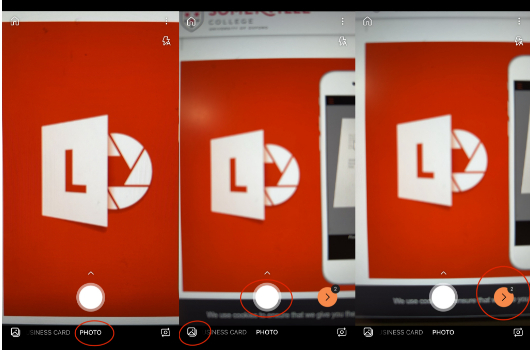
Scan Photo with Microsoft Lens
Step 5. Tap “Done” in the lower right corner to save and share the photos.
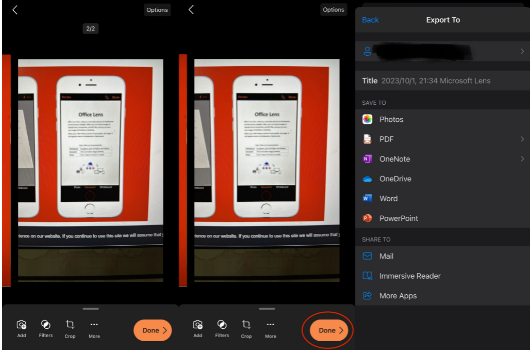
Edit and Share Photo via Lens
FAQs
How to Scan a Picture on iPhone without Glare?
To avoid glare when scanning, you can use PDFgear Scan. Download and open the app > Choose “Camera” > Place the image in a well-lit area and adjust the camera angle > Take the picture > Use the editing features of this app to minimize reflections.
How to Scan Passport Photo on iPhone?
To scan a passport photo, place your passport on a flat, well-lit surface, adjust the camera angle, and capture the photo using the native camera app or a scanning app like PDFgear Scan.
How to Scan Pictures on iPhone Free?
There are several free ways to scan photos on your iPhone:
- Use the local camera to shoot.
- Use the scanning function of Notes.
- Choose a free scanning software, such as PDFgear Scan.
The three methods above offer free scanning, allowing you to digitize your photos at no additional cost.
What Is the Best Way To Scan Multiple Photos at Once?
Use a specialized application such as PDFgear Scan, which has features for efficiently scanning and organizing multiple photos. The app can also automatically detect the edges of photos and optimize scan quality.
