How to Add an Arrow to a PDF Document Online/Offline

Summary :
This guide will provide detailed instructions for adding arrows to PDFs with 5 methods.
Table of Contents
How to Add Arrows to PDF
When presenting complex information or guiding the viewer’s focus, arrows can be used to draw attention to specific sections of the PDF content that you want to emphasize.
Adding arrows to a PDF also allows you to annotate PDF documents when reviewing and editing your PDFs. A comprehensive PDF editor will make creating an arrow to a PDF document a stress-free task.
This article reveals 5 efficient ways of drawing arrows to PDF files, with online PDF editing tools and offline PDF editors.
A Free Online PDF Editor – Easy to Use
PDFgear is a robust PDF management solution that provides a comprehensive suite of editing capabilities. For its functions, it is in favor of editing PDFs, organizing PDF pages, adding shapes to PDFs, compressing PDFs, etc.
Without requiring any software installation, and free of ads or watermarks, PDFgear’s web-based PDF editor makes it clear-cut to add arrows to PDF files with just a few clicks.
Step 1. Upload a PDF File Online
Directly head to PDFgear online PDF editor, Upload PDF files by clicking the button, or drag and drop a PDF file online.

Upload a PDF File to Online PDF Editor
Step 2. Add Arrow to PDF Online
Navigate to the Add or Edit annotations icon in the toolbar, select Add Shapes, then choose Add Arrow.
Add an Arrow to a PDF Online
Step 3. Customize Arrow Properties
Select the arrow, right-click, choose Properties, start to customize the properties such as Start Arrow, End Arrow, Fill Color, Line thickness, then select OK.
Set the Arrow Properties in a PDF
Step 4. Download the Updated PDF
After customizing the arrow properties, download the updated PDF file by clicking the Download icon.
Download the Updated PDF
With Google Docs – For Google Account Subscribers
If you are a Google account subscriber, it is straightforward to draw an arrow to a PDF file with Google Docs.
Step 1. Upload a PDF to Google Drive and Open it with Google Docs
Head to Google Drive and sign in, click New, choose File Upload to upload a PDF file, then open it with Google Docs.
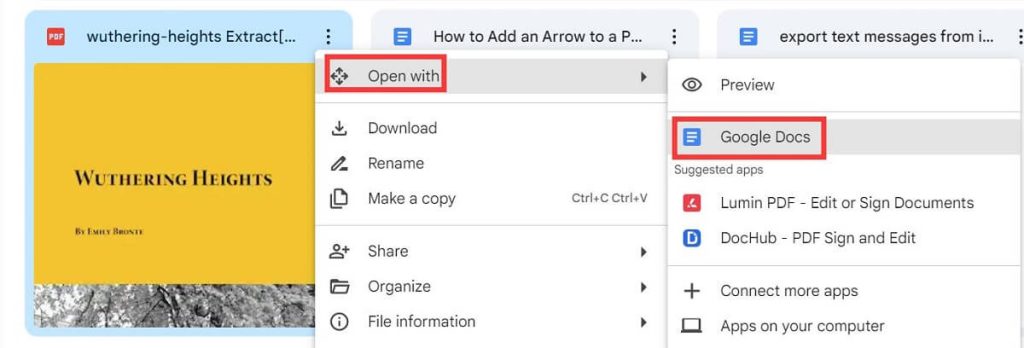
Open a PDF File with Google Docs
Step 2. Add Arrow to PDF in Google Docs
Choose Insert in the toolkit, select Drawing, and click + New to draw a new arrow.
Steps to Draw an Arrow in a PDF in Google Docs
In the new Drawing window, hit the Shape icon, click on the Arrows option where you can see various shapes of arrows. Then choose the arrow you need, customize the Fill Color, Border Weight, etc., and hit the Save and close button.
Draw and Customize the Arrow in a PDF with Google Docs
Step 3. Save the File in PDF Format
Navigate to File, choose Download, and select PDF Document (.pdf) to download the updated file in PDF format.
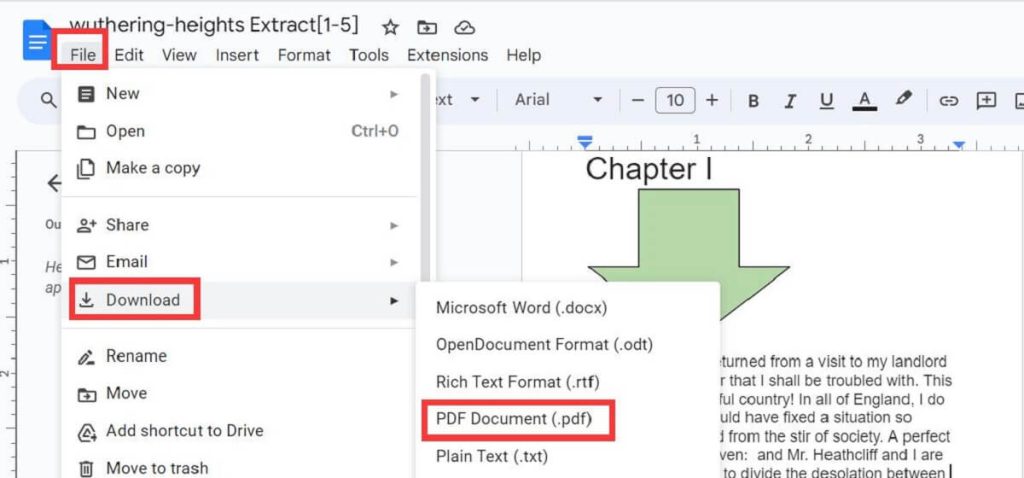
Save the Updated File in PDF Format
Via Adobe Acrobat – A Paid Professional PDF Editor
As a world-renowned PDF editor, Adobe Acrobat allows you to add comments to a PDF by highlighting text, underlining text, adding stamps and shapes, etc while reviewing the file.
If you are an Adobe Acrobat Pro user, follow the content below to unlock the steps to add an arrow to a PDF file.
Step 1. Open a PDF File with Adobe Acrobat
Launch Adobe Acrobat software, open a PDF file, then select the Comment feature in the right-side toolbar.
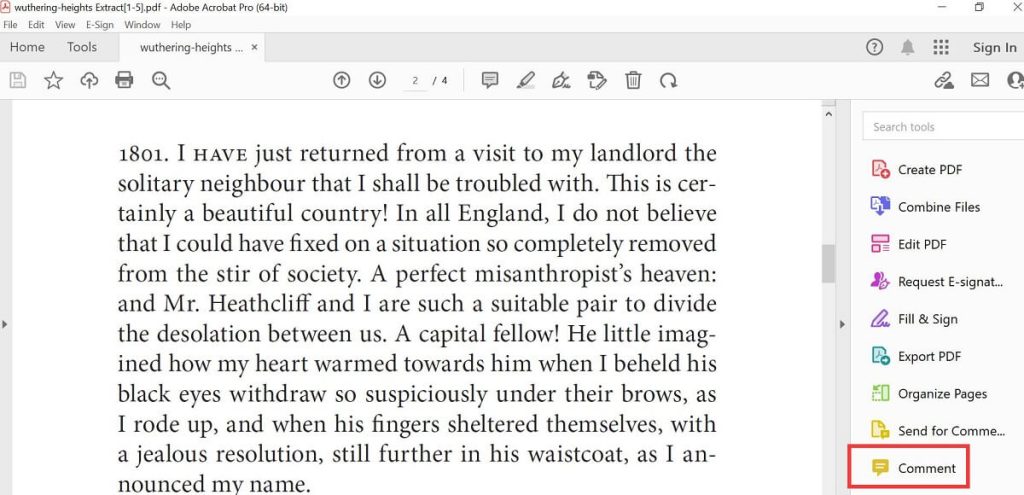
Select the Comment Feature in Adobe Acrobat
Step 2. Create and Customize the Arrow in the PDF File
Navigate to the Drawing Tool icon in the comment toolkit, then select Arrow to continue.
Select Arrow in Adobe Acrobat
Draw an arrow in the proper position and select it, right-click, and choose Properties where you can customize the arrow properties, then click OK to the next step.
Customize the Arrow Properties in a PDF with Adobe Acrobat
Step 3. Save the New PDF in Adobe Acrobat
Navigate to File again, select Save to save the PDF file directly, or choose Save As as a new PDF file.
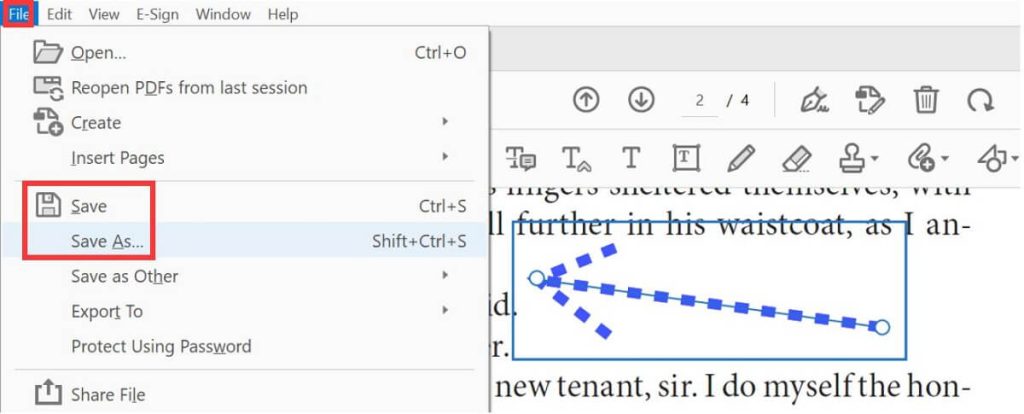
Save the Updated PDF File in Adobe Acrobat
Using LibreOffice – A Free Open-source PDF Editor
As one of the open-source PDF editors, LibreOffice enables you to edit existing words in PDF, manage PDF pages, and add a digital signature to a PDF.
It is free and safe to use and supports various platforms like Windows, macOS, and Linux.
While the tool functions adequately for smaller PDF files, it struggles to handle large, complex PDF documents, and the software’s interface design feels outdated.
Step 1. Download and Launch the Software
Download the LibreOffice software, install it, then run it on your device.

Launch LibreOffice Software on Your Device
Step 2. Insert an Arrow into a PDF
Find the Lines and Arrows icon in the left side toolbar, choose the shape of the arrow you want, draw an arrow at the proper position in the PDF file, and then set the Properties accordingly.
Draw an Arrow in a PDF with LibreOffice
Step 3. Save the Modified PDF File
Click File again, Save or Save As the modified PDF document on your computer.

Save the Modified PDF File in LibreOffice
Using Preview – For Mac Users Only
Mac users can conveniently add an arrow to a PDF using the built-in Preview App.
The following steps outline the process:
Step 1. Open a PDF file with Preview
Open a PDF document with Preview on your Mac, and select Show Markup Toolbar.

Show Markup Toolbar
Step 2. Add an Arrow to the PDF File
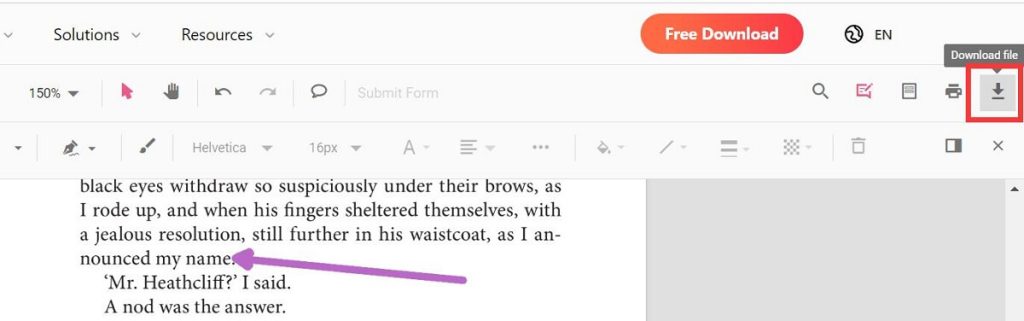
Under the Show Markup Toolbar section, hit the Shapes icon, select Arrow ↗ from the dropdown menu, and set the parameters for the arrow by changing the length, direction, color, etc.
Add an Arrow to a PDF in Preview
Step 3. Navigate to File and Save the Uodated PDF Document
FAQs
Can I add an arrow to a PDF document with Microsoft Word?
Yes, Microsoft Word supports inserting arrows into PDFs. Open a PDF in Microsoft Word, press Shapes, choose Arrow, add your arrow, navigate to File, Export, and Click Create PDF/XPS.
How do I add arrows to a PDF for free?
You can use the free PDF editor LibreOffice to add an arrow to PDF for free. More efficiently, PDFgear online PDF editor also allows you to reach the goal for free, without any registration or download hassle.
How do I add shapes to PDF with free software?
We highly recommend PDFgear software for you to add shapes such as lines, rectangles, oval, and ink. It requires no registration and is completely free to use.
Final Thoughts
This guide outlines 5 different methods for adding arrows to PDF documents. Each approach offers its advantages and drawbacks.
Among the PDF editors discussed, we recommend using the PDFgear online PDF editor, as it allows you to insert arrows without downloading software, creating an account, or dealing with ads and watermarks.